As a consultant, a common scenario among my clients is storing Excel-based data sources in online locations, like SharePoint or OneDrive Online. Here, we break down one of our favorite life hacks to get the job done right.
From a data governance perspective, storing flat files in shared locations is a must, especially when working among large teams of developers. Using a shared file location facilitates the troubleshooting process. For example, you can more easily locate errors in the source file or track down a file location that has moved.

As noble as it is to share Excel files in online sources, there is no standardized Power BI Desktop Data Connector for Excel Online sources. In Dataflows using Power Query Online, you can insert a URL as the source for Excel workbooks. However, the only option in Power BI Desktop is the native “Excel Workbook” connector which points to a file location on a local machine.
Power Query Life Hacks:
In Power BI Desktop, we can use one of my favorite Power Query life hacks to connect to Excel Online sources in Power BI Desktop.
A Power Query life hack is using the Power Query interface to provide a rough framework for common transformation steps. Sometimes, the standardized transformation options in the Power Query editor simply do not accomplish what you need to transform your data properly.

Every time you click one of the options in the Power Query ribbon or select a New Data Source connector, behind the scenes, the Power Query engine translates the step as a piece of M-code. You can modify the automatically generated code in the formula bar or in the Advanced Editor to suit your exact transformation needs.

Writing custom M statements can be tricky, especially given the complexities of the M-formula language. The sight of a blank Advanced Editor window is enough to strike fear in the heart of any Data Engineer.
By using the Power Query interface as a starting point, you can save time sifting through M-formula documentation for basic transformation steps. Instead, you can devote more time diving into the complexities.
How to Connect to Excel Online Sources in Power BI Desktop
- First, download the Excel source locally on your machine. I like to do this to get a rough feel for how the data source looks; however, you could also start with any blank Excel workbook if you want.
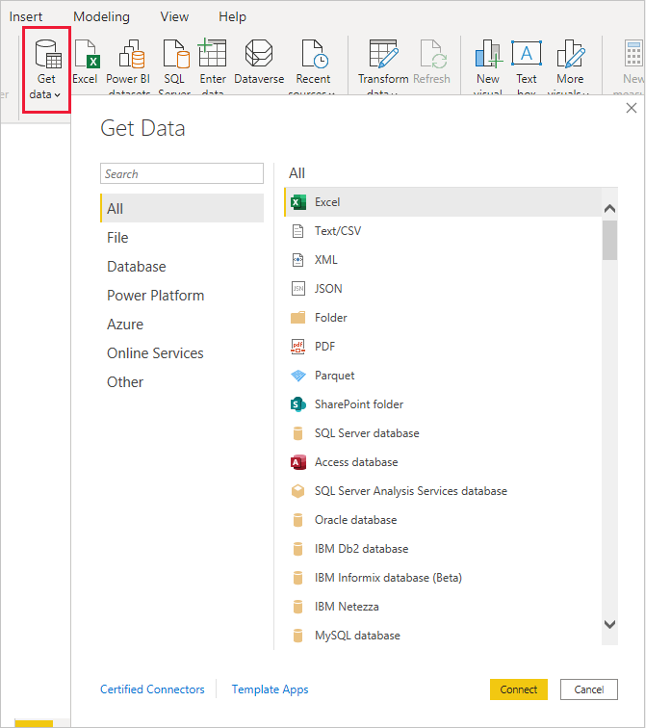
- In Power BI Desktop, select the native Excel Workbook connector by navigating to New Source > Excel Workbook.
- Select the Excel file located on your local machine.
- Click Transform.
- In the Properties pane, click the row for the Source step.

- Expand the formula bar by clicking the down arrow icon.


-
- Here, you can see behind the curtain of the Power Query user interface. By clicking New Source > Excel Workbook, the Power Query engine translated this action as the M-code snippet “Excel.Workbook()”.
- Inside the Excel.Workbook() block, there is a nested File.Contents() block that points to the file location on your local machine.
- We can erase this File.Contents() block and replace it with a Web.Contents() block to point to the URL where the Excel Online source is located.
-
- To generate the URL for SharePoint or OneDrive online sources, locate the Excel file in the document library. Click the ellipsis icon > Copy Link next to the file name.
- Click Copy.
- In the Power Query editor, erase the entire File.Contents() block – everything up until the , null, true) portion at the end of the line.

- Type in Web.Contents(“ with an opening double quote.
- Paste the URL from the online source.
- Warning: You need to clean up this automatically generated URL from the Copy Link option. Depending on the style of SharePoint site, erase one of the two highlighted portions from the URL.

-
- Erase the :x:/r/ or the :x/s/ after the sharepoint.com/ portion.
- Erase all the text from the question mark to the end.
Examples of Clean URLs:

- Make sure to enclose the URL with a final double quote and closing parenthesis. ” )
- Hit enter in your formula bar to submit the changes.

- Click the Edit Credentials button in the yellow ribbon. Sign in to your Organizational account that has access to the SharePoint site.
Finishing Touches:
When dealing with sensitive Organizational sources, it is best to change the Privacy Level to prevent data leakage and adhere to compliance standards.

- By default, the Power Query engine tries to combine all transformation steps into a single M statement which it pushes back to the source to perform.
- For Public sources, the Power Query engine tries to improve query performance by exposing queries from multiple sources.
- Click Data Source Settings and click the Excel source. Then, click Edit Permissions and select either Organizational or Private as appropriate.
- Make any further Power Query transformation steps needed on the source file.
- Click Close & Apply from the far-left corner of the Power Query ribbon when you are ready to connect this table to the model or publish the dataset.
Publish to Power BI Service:

- Click Publish and select the desired Workspace.
In Power BI Service, navigate to the destination Workspace.

Locate the published Dataset. Click the ellipsis icon > Settings.
- Expand the Data Source Credentials section.
- Select the Excel Web source > Edit Credentials.
- Change the Authentication Method to OAuth2.
- Select the same Privacy Level setting you determined in Power BI Desktop. The Privacy Level settings are not automatically transferred to the Service when you publish the dataset or report.
- Click sign in and sign in using the popup window.
- Refresh the dataset and set a Scheduled Refresh cadence as necessary.
Final Words of Caution:
Now, any time the file is modified online, the changes will be reflected once the report is refreshed. Be aware that working with Excel sources can be challenging in the long run. When using Excel Online sources, always develop a process for source file owners regarding proper maintenance of the source.
Communicate with the file source owners that any time a change is made in the Excel source, Power BI content will be impacted downstream. Any time an error occurs in the source, or the file structure changes, Power BI content can fail to refresh.
Common behaviors that cause refresh failures are:
- Cells containing #N/A errors
- Cells that have values that conflict with Data Types designated in Power BI
- Power Query steps referencing a specific columns or sheets that are renamed or removed from the source location
Maintaining Excel Online sources can provide better team visibility and facilitate collaboration among teams, as long as proper governance processes are understood and followed by all.
Let our experts at 3Cloud come alongside you and leverage our technical experience to provide guidance on how to apply business intelligence in your organization no matter where you are on your analytics journey. Take this adoption assessment to score your organization’s Power BI maturity level, or read through our Modern Self-Service Analytics eBook to gain a better understanding of the awesome capabilities of Power BI.
Ready to get started today? Check out our Modern Business Intelligence Jumpstart Solution or Contact us directly today to learn more!


