Have you ever tried to connect to an Oracle database in Power BI Desktop and felt like you’re on a wild goose chase? Don’t worry – you’re not the only one. Unlike other Power BI data connectors, which are straightforward to use, there are a few prerequisites to follow before connecting to secured Oracle databases.
I recently learned from the master, Devon Reddick, how to connect to Oracle databases in Power BI Desktop and would love to share our findings to hopefully prevent you from experiencing similar bouts of insanity.
Install Oracle Client
Install the Power BI Desktop
Install the Power BI Desktop 64-bit version:
-
- Do NOT use the Microsoft Store version of Power BI Desktop.
- If you have the Microsoft Store version installed, be sure to open the correct version when working with Oracle databases.
- Tip: the 64-bit version icon has a transparent background, while the Microsoft Store icon has a black background:
- Do NOT use the Microsoft Store version of Power BI Desktop.

Create an Oracle Login
Create an Oracle Online Login if you do not have one (it’s free to create one).
Install Oracle ODAC
- Click this link to download 64-bit Oracle Client:

- Accept the Oracle License Agreement.
- Sign into Oracle using your Oracle Online login credentials.
- Download the ZIP folder to your local machine.
- Extract the ZIP folder to your local machine.
Open the unzipped folder
- Double click the Setup file to Launch the program.

- Click “yes” on the popup window.
Once the installer runs, an installation popup appears.
- Select Product Language
-
- Click “English” > Next.
-
- Oracle Home User Selection
- Leave “Use Windows Built-in Account” selected > Next.
- Specify Installation Location
- You can use the default Oracle base (path) or add your own if you want a new location for storing your Oracle items.
- Keep note of the Oracle Base and Software Locations for troubleshooting later.
- Click “Next”.
- You can use the default Oracle base (path) or add your own if you want a new location for storing your Oracle items.
- Available Product Components
- Just click “Next” without changing anything.
- NET
- Just click “Next” without changing anything.
- DB Connection Configuration
- Leave blank > We will enter connection details in Power BI Desktop instead.
- Click “Next”.
- Perform Prerequisites Check
- Just click “Next” without changing anything.
- Wait a few moments for the connection to be configured.
- When the installation completes successfully, close the window.
Tip: It is a good idea to reboot your laptop to confirm the installation.
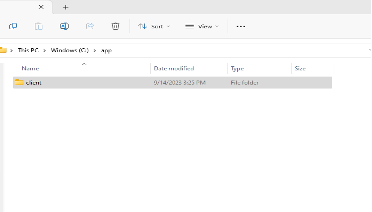
Make sure there is only ONE Oracle client on your machine.
- Navigate to your File Explorer.
- Click “This PC.”
- Navigate to the C-Drive.
- Open the “app” folder.
- Make sure there is only one “client” folder located inside the “app” folder:
Updating Oracle Paths
If you find that you are operating on an old Oracle client version or if you changed the Installation Location in Step #5, here are the steps to take to update the path:
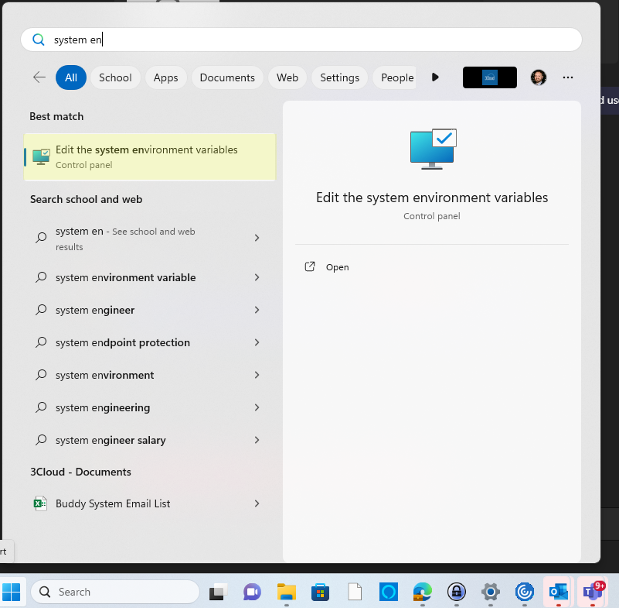
- In your Desktop programs, locate the “Edit the System Environment Variables” control panel:
2. From the popup, select the “Advanced” tab:
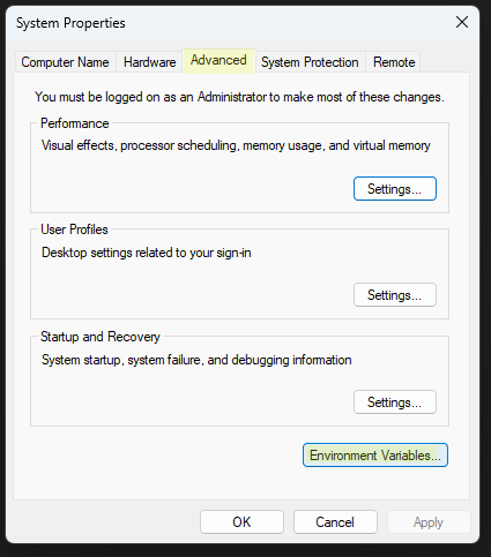
3. Click the “Environment Variables” button on the top right corner of the Advanced tab.
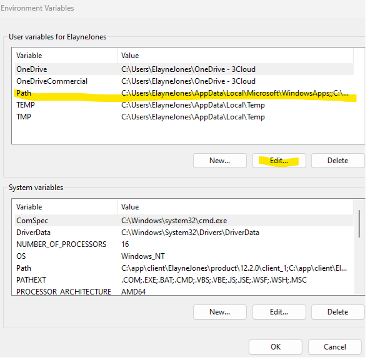
4. Select the “Path” line and click the “Edit” button to change the path to an updated version:
Connect in Power BI Desktop
- It’s common that you will need to connect to a VPN or use a Remote Desktop to connect to Oracle databases. Check with your IT team for guidelines on accessing Oracle databases and if there are any on-premises gateways that need to be used.
- Open the Power BI Desktop 64-bit program.
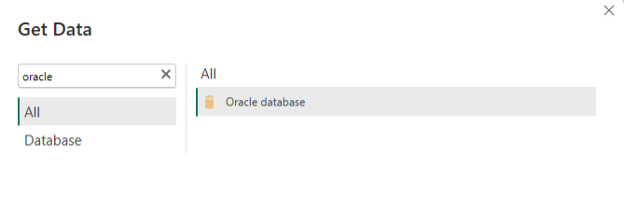
- From the top ribbon, Click “Get Data” > Oracle database.
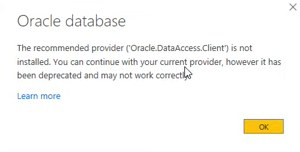
4. You may get a popup warning that says that the “Recommended Provider is not installed.” This is a known issue, and you can safely ignore and click “OK.”
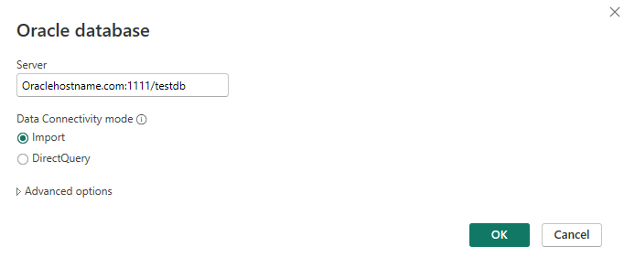
5. Enter the Server Name in the following format:
-
- HostName:PortNumber/SID
-
-
- Ex: Oraclehostname.com:1111/testdb
-
b. This information should be provided to you by someone on your IT team. You will need access to the Oracle DB, and your IT team will likely provide these details in a text file or Word document.
c. Leave Import mode selected.
d. If you want to enter a custom SQL statement, expand Advanced Options, and enter the statement.
-
- Note: It is not recommended to use a custom SQL statement. Using your own SQL statement prevents Query Folding from occurring. Wherever possible, we want to take advantage of Query Folding to improve report performance by pushing querying action back to the source system.
e. Click “OK.”
f. Note: If you experience issues connecting to the server, try removing the :PortNumber portion of the Server name entered above.
6. Click the Database tab.
-
- Enter your Oracle database Username and Password provided by your IT team.
- Note: This is not referring to the Oracle Online login created in Step #2. This refers to your Oracle database credentials, which were likely created by a DBA on your IT team.
- Enter your Oracle database Username and Password provided by your IT team.
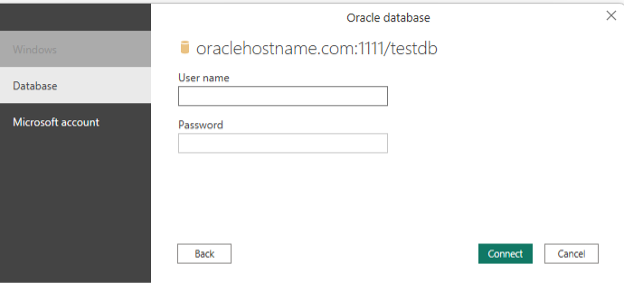
b. Click “Connect.”
7. Select the tables you need for your report and design your data model.
8. Transform the data if needed and design your visualizations.
Now you’re ready to bring your Oracle database information to life using Power BI!
Ready to learn more about the amazing capabilities of Power BI for visualizing your data? Let 3Cloud experts come alongside you and leverage our technical experience to provide guidance on creating meaningful insights based on your organization’s data estate. Take this adoption assessment to score your organization’s Power BI maturity level, or read through our Modern Self-Service Analytics eBook to gain a better understanding of the awesome capabilities of Power BI.
Ready to get started today? Check out our Modern Business Intelligence Jumpstart Solution or Contact us directly today to learn more!