We recently discussed options for securing internal access to Power BI reports and dashboards. That post also explained how to apply role-based security filters to a dataset, ensuring users only see the information appropriate for their roles. Dynamic row-level security (DRLS) is one of the most effective and efficient ways to restrict data views across an organization. Using DAX functions, DRLS filters the dataset based on the Power BI service user’s log-in credentials. This allows Power BI report authors to easily create filtered data views and skip the hassles of creating multiple security roles in the model and managing the assignment of users to these roles.
However, using dynamic role-based security in dashboards and reports has some limitations. One is that the data will be filtered to show only the data associated with the login credentials of the user. In some scenarios, users may want access to data associated with different user credentials. Circumstances such as these require that a filter instead be applied to a hierarchy in the data model. As an example, let’s look at a model with a security role based on geography.

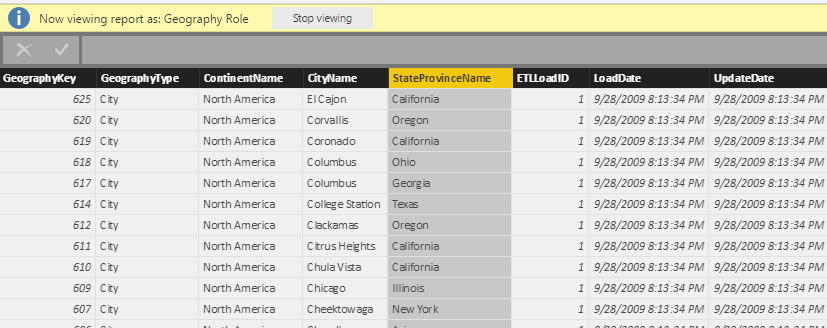
This security role filters dataset to the North American continent. This means that report consumers assigned to the Geography Role can view North America continent data. These users can also view data for the countries within that continent.
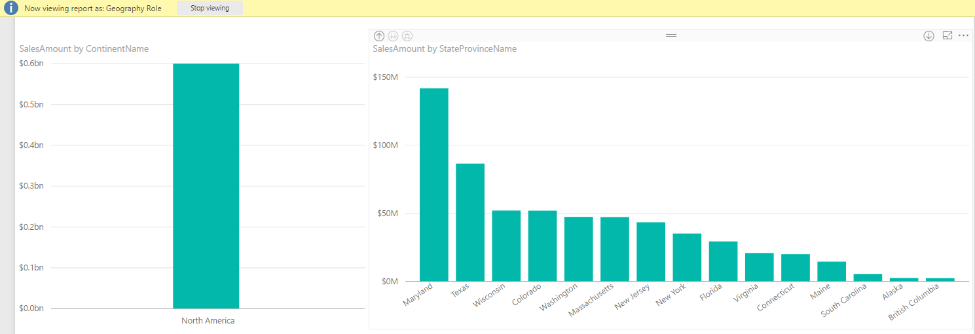
The geography table below has columns for both continent and state, enabling users to crossfilter the data for that continent.
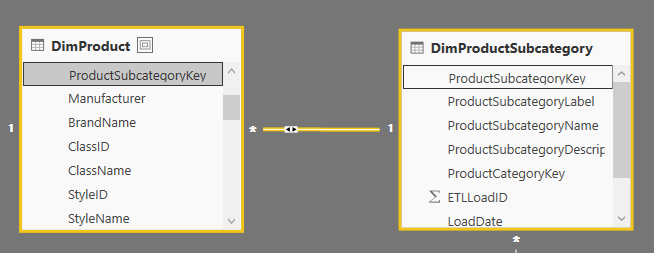
There are often times when there isn’t an option in the data model to crossfilter as shown above. Developers typically address this issue by creating additional dimension tables to support crossfiltering, then adding those tables to the data model. In the example below, we use a helper table to add categories to the product list. By creating a product subcategory table, and adding keys to the products table, we can define product groupings by subcategory.
Additional dimension tables are often used to apply an organizational hierarchy to a fact table. Suppose that a company wants to look at sales based on organizational hierarchy. Ideally, they want to be able to drill up from an individual salesperson’s results through the organization – sales manager, district manager, regional manager, country manager and so on. Creating additional dimensional tables is one way to accomplish this.
Though this approach may enable users to drill up and down through organizational data, without security roles it may also give users access to all the company’s sales data – information typically restricted to upper-level management and employees governed by insider trading restrictions.
Creating security roles configured to limit access for groups of employees to specific data, then assigning users or security groups to those roles once the report has been published to the Power BI service, is one way to secure data access.
However, you might be thinking that this approach sounds complicated, especially in a larger organization, or in one where the combination of employees, managers, and executives is not clearly hierarchical, and you would be correct. Maintaining the security roles, and users assigned to those roles, can be time consuming and error prone.
Here’s where we come back to dynamic row-level security. It’s one of the most efficient ways to assign users or security groups to specific roles after publishing a report to the Power BI service. The process filters data based on the Power BI user’s log-in credentials, passing those credentials to the data model through a DAX expression used in a security role. Let’s see what that looks like:

When using this role in a published report, the Power BI service passes the user’s email log-in address to the model, filtering the data accordingly. To test the functionality, we can manually substitute an employee email address in double quotations for USERPRINCIPALNAME, as shown below:

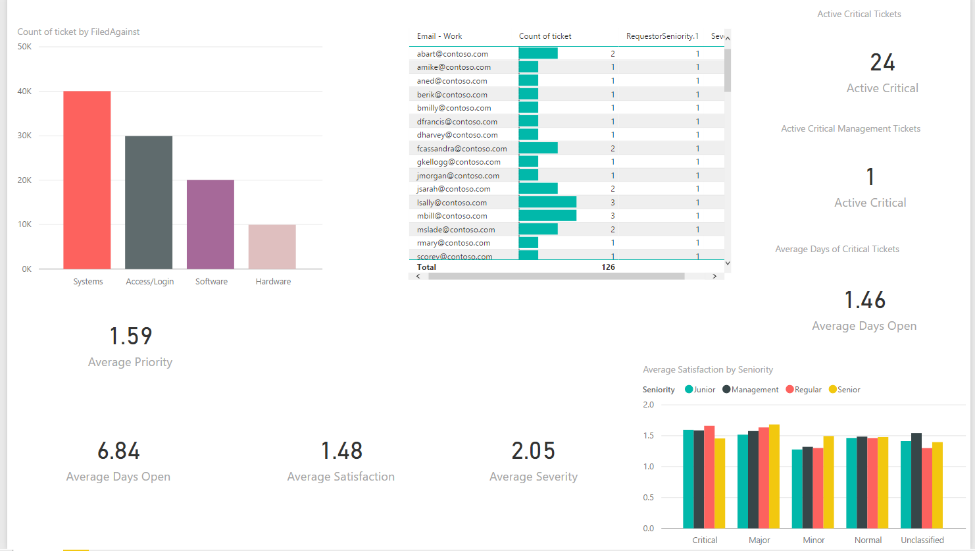
When viewing the report without the security role applied, we see the following data:
However, when we use the View as Roles function in the Security group on the toolbar, we see data filtered by that email address:
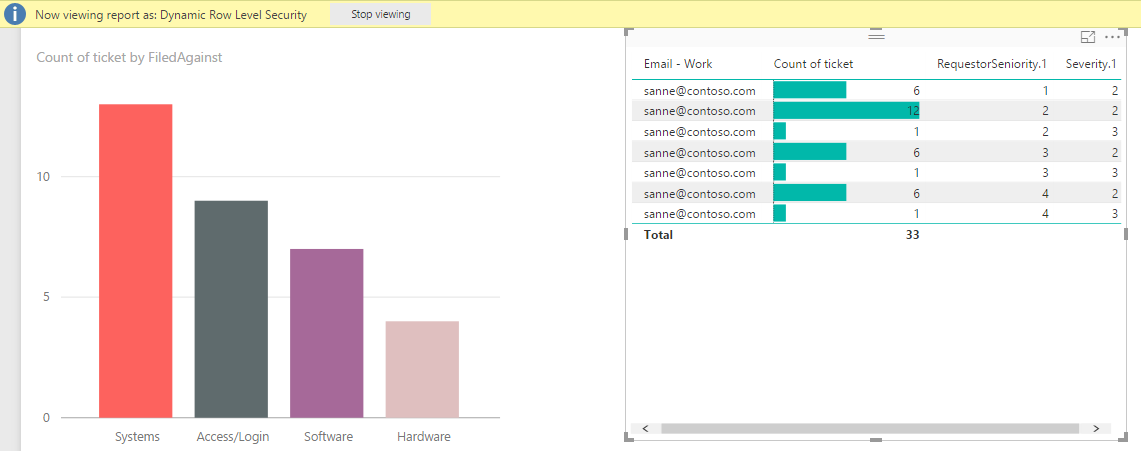
However, our fictional support organization has a hierarchy, and the user above ([email protected]) has a manager. When we change the hardcoded value to her manager ([email protected]), we see the following:
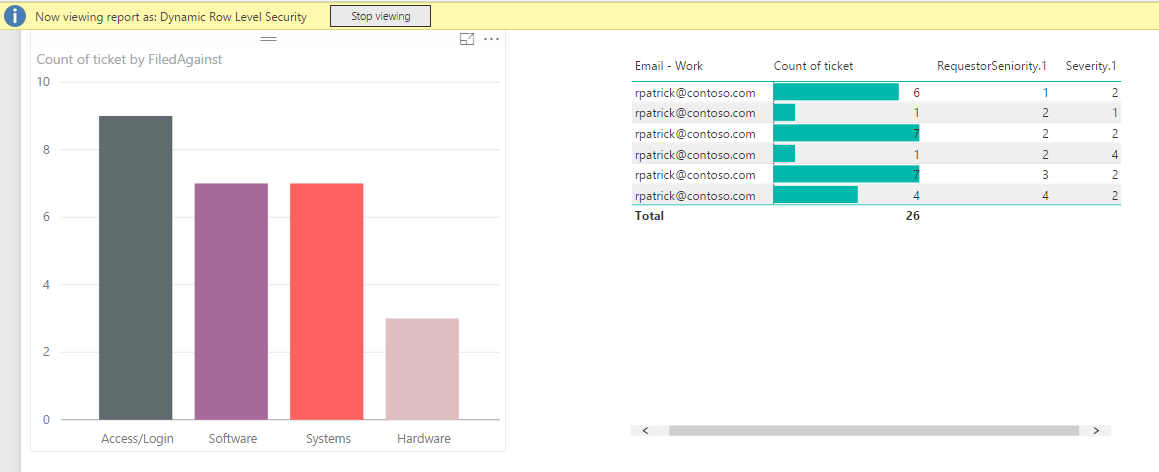
The dynamic row-level security role filtered the data to only show those tickets assigned to [email protected]. This is by design, as the USERPRINCIPALNAME function filters data to only show tickets assigned to that specific user.
As discussed earlier, most organizations want to see a rollup of metrics by organizational hierarchy. In this case, the manager (rpatrick) has five employees that report to him. To accomplish this goal, and use dynamic row-level security in our report, we need to implement the PATH function in the model.
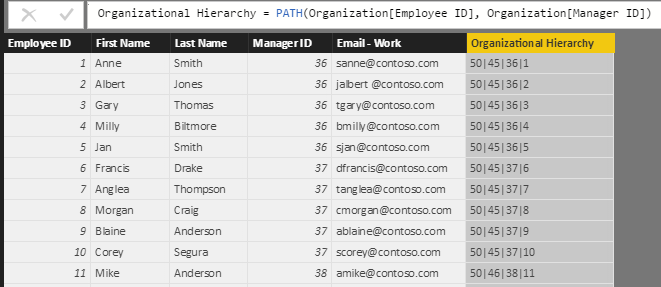
The PATH function is used with parent-child hierarchies, like those typically found in organizational charts. When used in a calculated column, the function creates a delimited text string with the identifiers of all the parent values for each child value in the table. In our example, the user “sanne” reports to the user “rpatrick”, who then reports to another manager, and so on. The PATH function allows us to map the parent-child hierarchy from the lowest level to the highest level in the organization. The function automatically generates the complete hierarchy, even though each employee only has their direct manager’s ID associated with their email address.
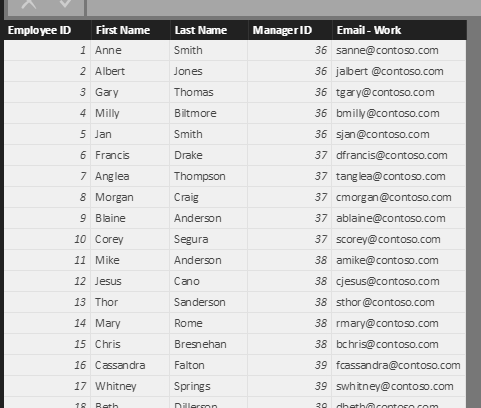
As you can see below, once we add the calculated column with the PATH function, the complete hierarchy for each employee is generated:
The next step is to create an additional column in the model for each level in the organizational hierarchy, and to get the email address for the corresponding employee ID. This is necessary for the use of dynamic row-level security, since it needs the email address as the value for USERPRINCIPALNAME. Our example organization has four hierarchy levels, so we will create four additional calculated columns that capture the email address for each hierarchy level, and get the corresponding email address using the following function:
Org Level 4 = LOOKUPVALUE (
‘Organization'[Email – Work],
‘Organization'[Employee ID],
PATHITEM ( ‘Organization'[Organizational Hierarchy], 4, 1 )
)
The PATHITEM function determines which level in the PATH string should be retrieved. In the DAX example above, the 4th level in the hierarchy is being returned. After we’ve repeated the process for the other three levels in the hierarchy, we’ll have a table that looks like the following:

Now that we have the parent-child hierarchy with email addresses implemented in the model, we can modify the role to use dynamic row-level security in the context of a hierarchy with the following expression:
[Email – Work] = USERPRINCIPALNAME()
|| [Org Level 4] = USERPRINCIPALNAME()
|| [Org Level 3] = USERPRINCIPALNAME()
|| [Org Level 2] = USERPRINCIPALNAME()
|| [Org Level 1] = USERPRINCIPALNAME()
Using the OR operator (II) in the expression means that the role will evaluate the user’s email address against each level in the organizational hierarchy.
We can again test the functionality by using the hardcoded email addresses in the role. For example, if we replace USERPRINCIPALNAME() with “[email protected]” as shown below, we’ll see all the data shown for her level in the hierarchy. As a member of the lowest level of the parent-child hierarchy, only the tickets assigned to her will be shown. However, if we use her manager’s email address “[email protected]”, the data is filtered to show all of the tickets assigned to him and any employee that reports to him:
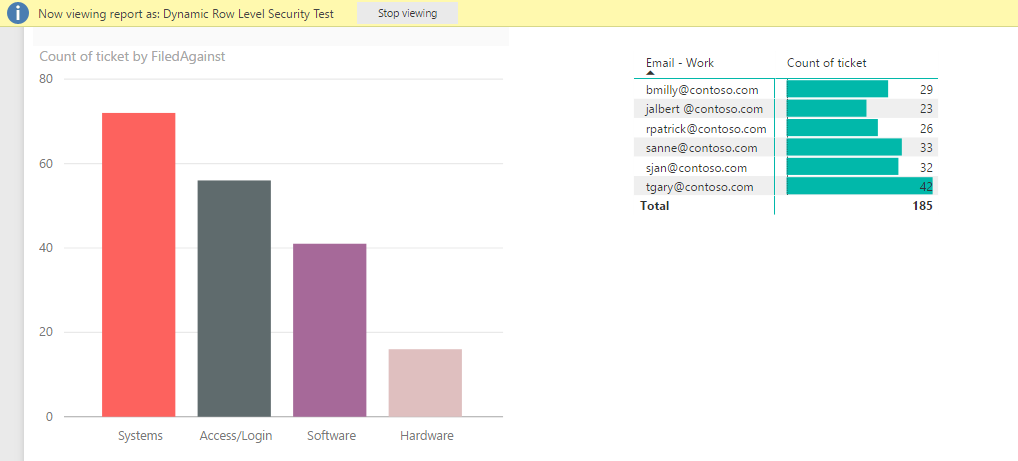
This approach enables dynamically filtered data based on the email address of the user accessing the report, and limits the dataset to only that employee and his or her subordinates. This can greatly reduce the number of Power BI reports and security roles that an author needs to create, and can significantly simplify the management and governance of the groups assigned to security roles once the report is published to the Power BI service. In this example, a single report and a single role can be utilized to provide the appropriate filtering of data for anyone in the organization. In addition, if the employee data is being imported from an official HR source, whenever new employees are added or the organizational structure changes, the report will automatically be updated to filter the data correctly.
Creating the correct level of access and security for your Power BI reports, dashboards, and datasets can be complicated. If you have a question or want to know more about how BlueGranite can help your organization with Power BI solutions, contact us!

