In this installment of 3Cloud’s Knowledge Mining Showcase, we are going to learn how to create an Azure Search Service and perform searches using application programming interfaces (APIs).
Even though the Azure Portal gives us a reasonable user interface to create and manage our searches, APIs give us more flexibility and can be saved and rerun many times.
Moving forward in the Knowledge Mining Showcase, we will primarily be using APIs, rather than the Azure Portal user interface.

Before we begin, you will need a few things,
- An API development environment. I use Postman, which you can get here.
- A familiarity with RESTful APIs and how to use them. If you are new to APIs, you can get a good start and learn about the different API methods here.
- A familiarity with Azure Search and an understanding of how to create an Azure storage account, and an Azure Search Service. Both of these are covered extensively in the Azure Search post of the Knowledge Mining Showcase.
- A storage account with data to index and search.
Getting Started
Details on creating an Azure storage account with blob containers are provided in the Azure Search post of the Knowledge Mining Showcase. We will be working with a common dataset used in Microsoft’s Knowledge Mining Bootcamp, which is also an excellent introduction to Azure Search. You can go to the Bootcamp. To get the dataset, go to the GitHub repository at https://github.com/Azure/LearnAI-KnowledgeMiningBootcamp.git and clone the repository. You’ll find the sample data in the resources/dataset/ folder.
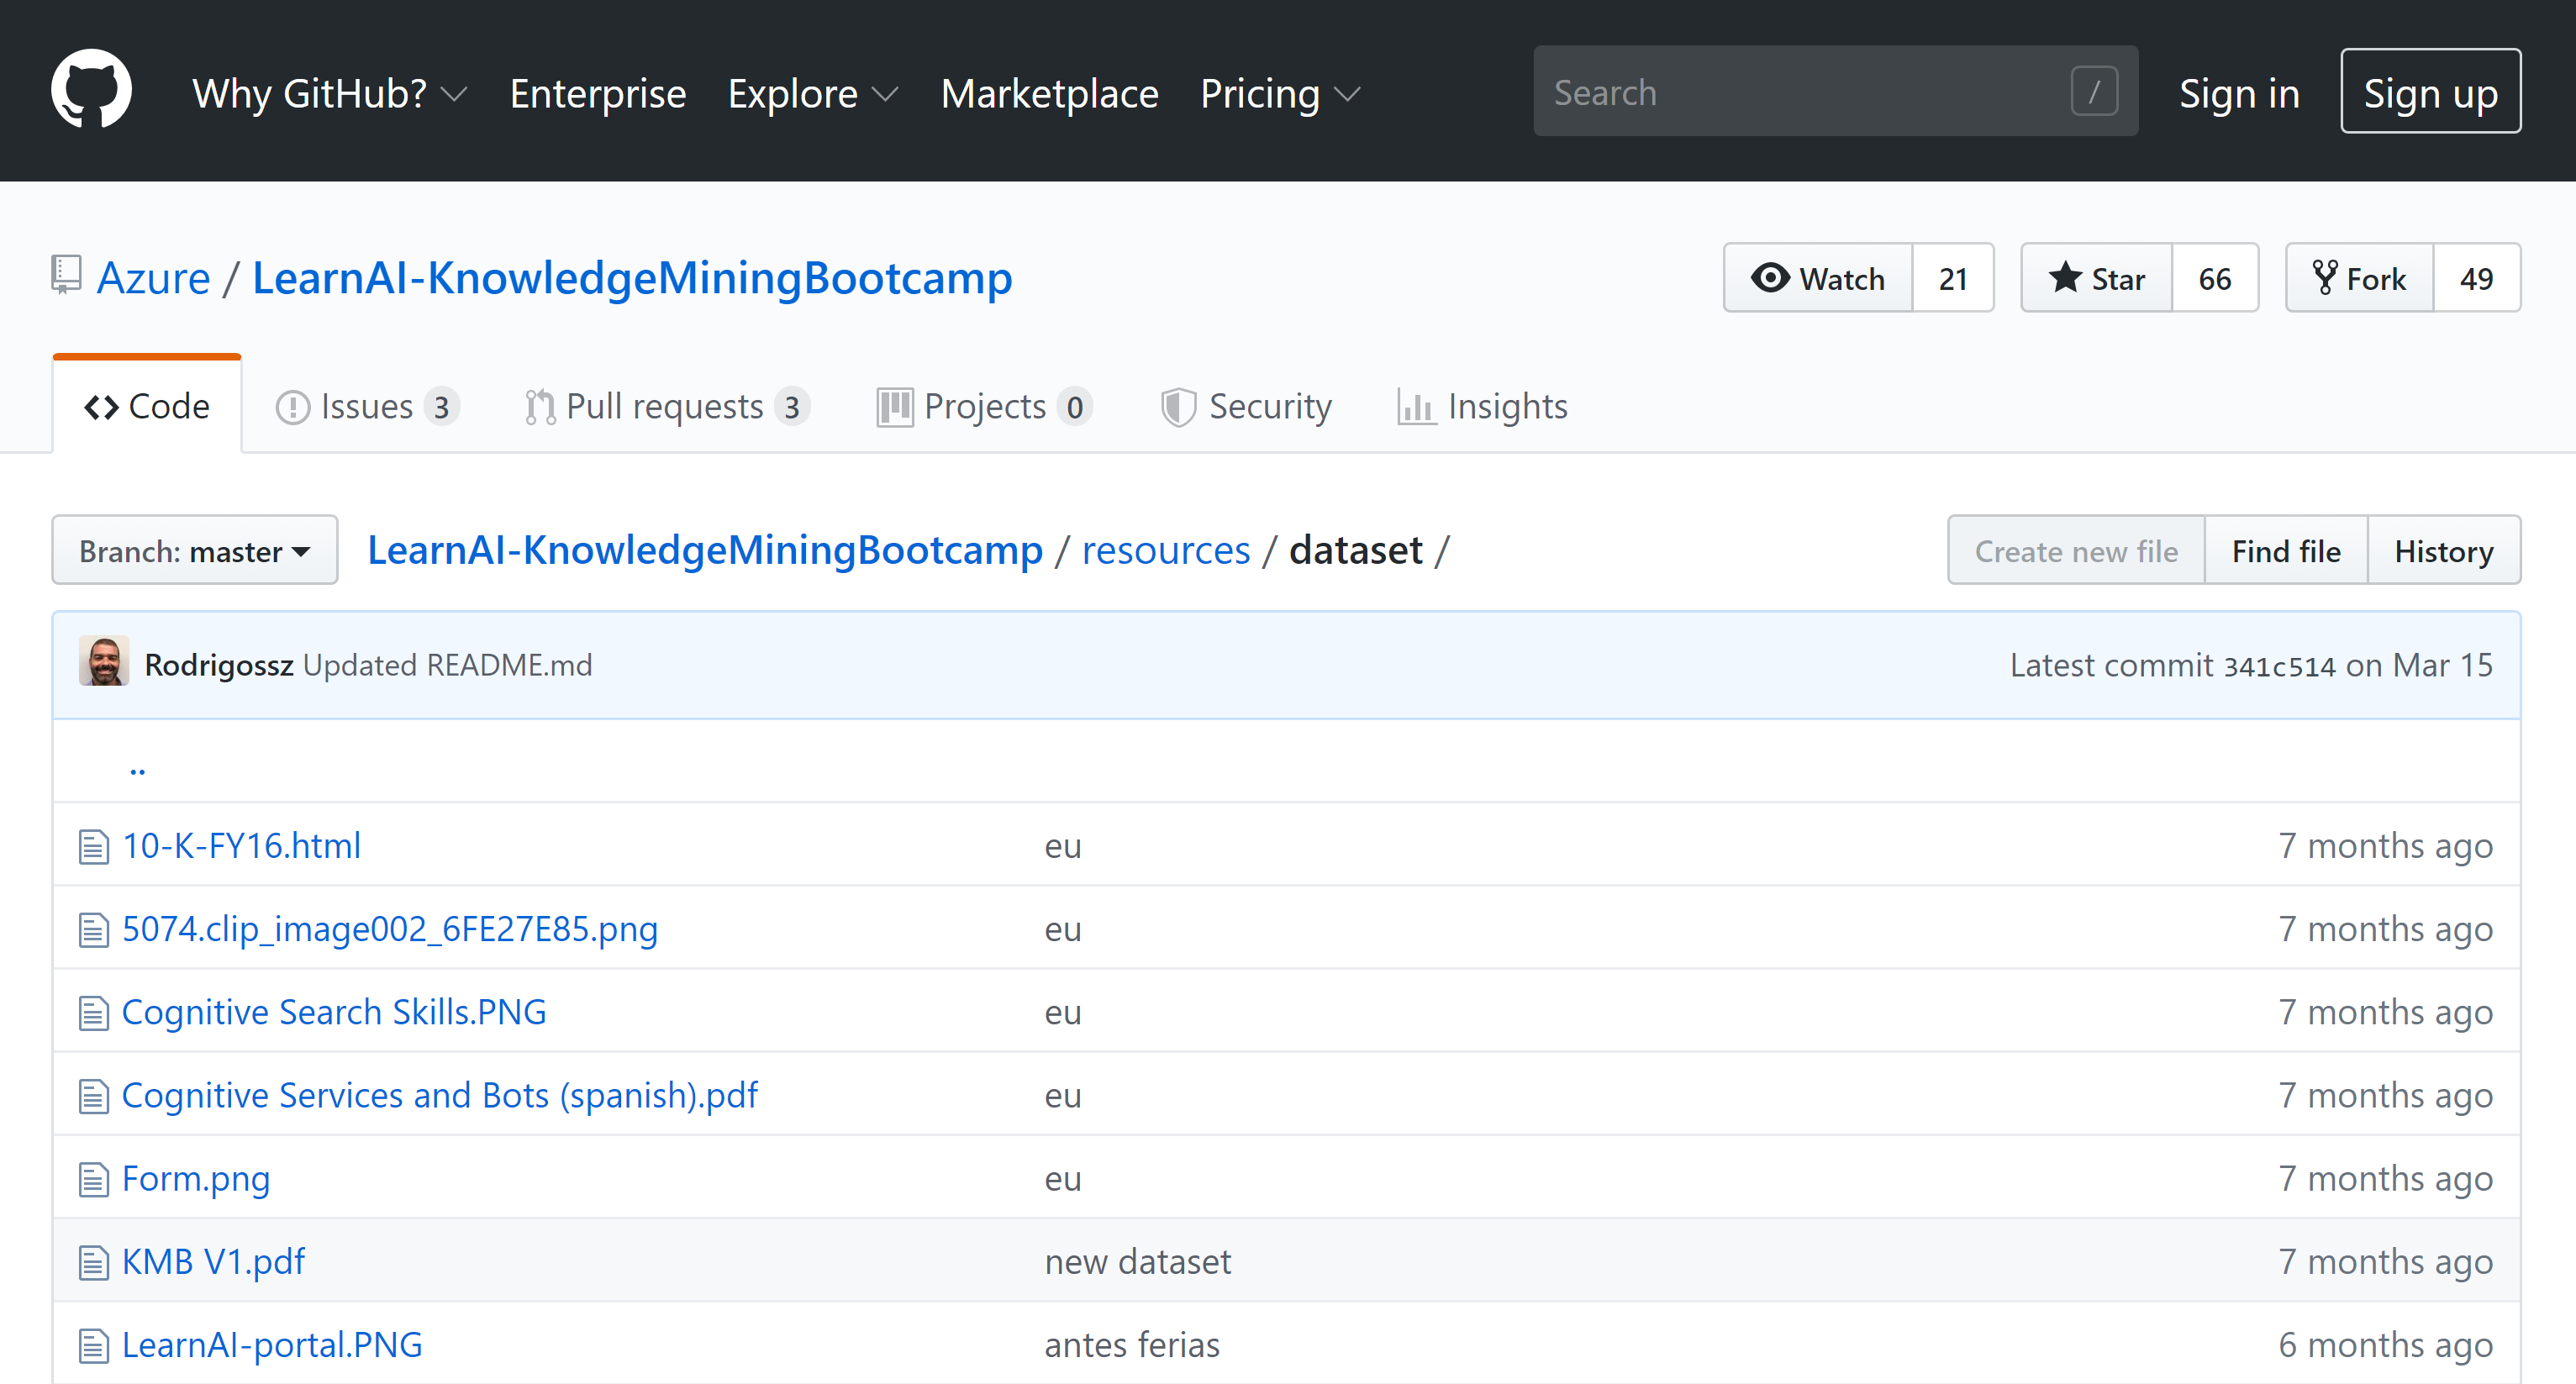
Upload this data into your blob container if you wish to follow along and get the same results that I get. It’s fine to use your own data if you prefer. Try to use a combination of PDF, Word, Excel, HTML, and graphic files.
Once you have your data loaded, you will need to create a Search Service. Again, details on how to do this can be found in the Azure Search post of the Knowledge Mining Showcase.
Have your blob container loaded with data and your Search Service created? Let’s move forward.
Creating a Dataset
We need to give a link to our data to the Search Service. We do this by creating a data source in the Search Service. The format for the API call to create a data source is:
POST https://[Search_Service_Name].search.windows.net/datasources?api-version=[api-version]
Where [Search_Service_Name] is the name of your Search Service and [api-version] is the version of the API you are using. “2019-05-06” is the most current production version as the writing of this post.
I’ve created a Search Service named ‘bgblogsearchservice’, so my call would be:
POST https://bgblogsearchservice.search.windows.net/datasources?api-version=2019-05-06
But we’ve got to add information about the blob container we are using for our data source. We do that in the body of the POST call. The body for my call looks like this:
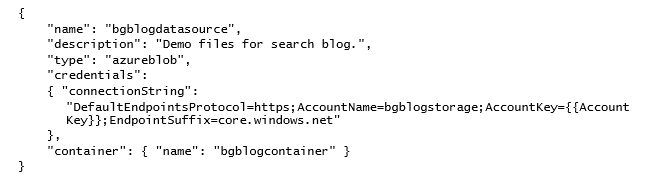
Where:
name – The name of your new data source
description – A description of your data source
type – Can be one of the following: azureblob, azuretable, azuresql, or documentdb
credentials – Contains the connection string to your storage account
container – The name of the container where your blobs are stored
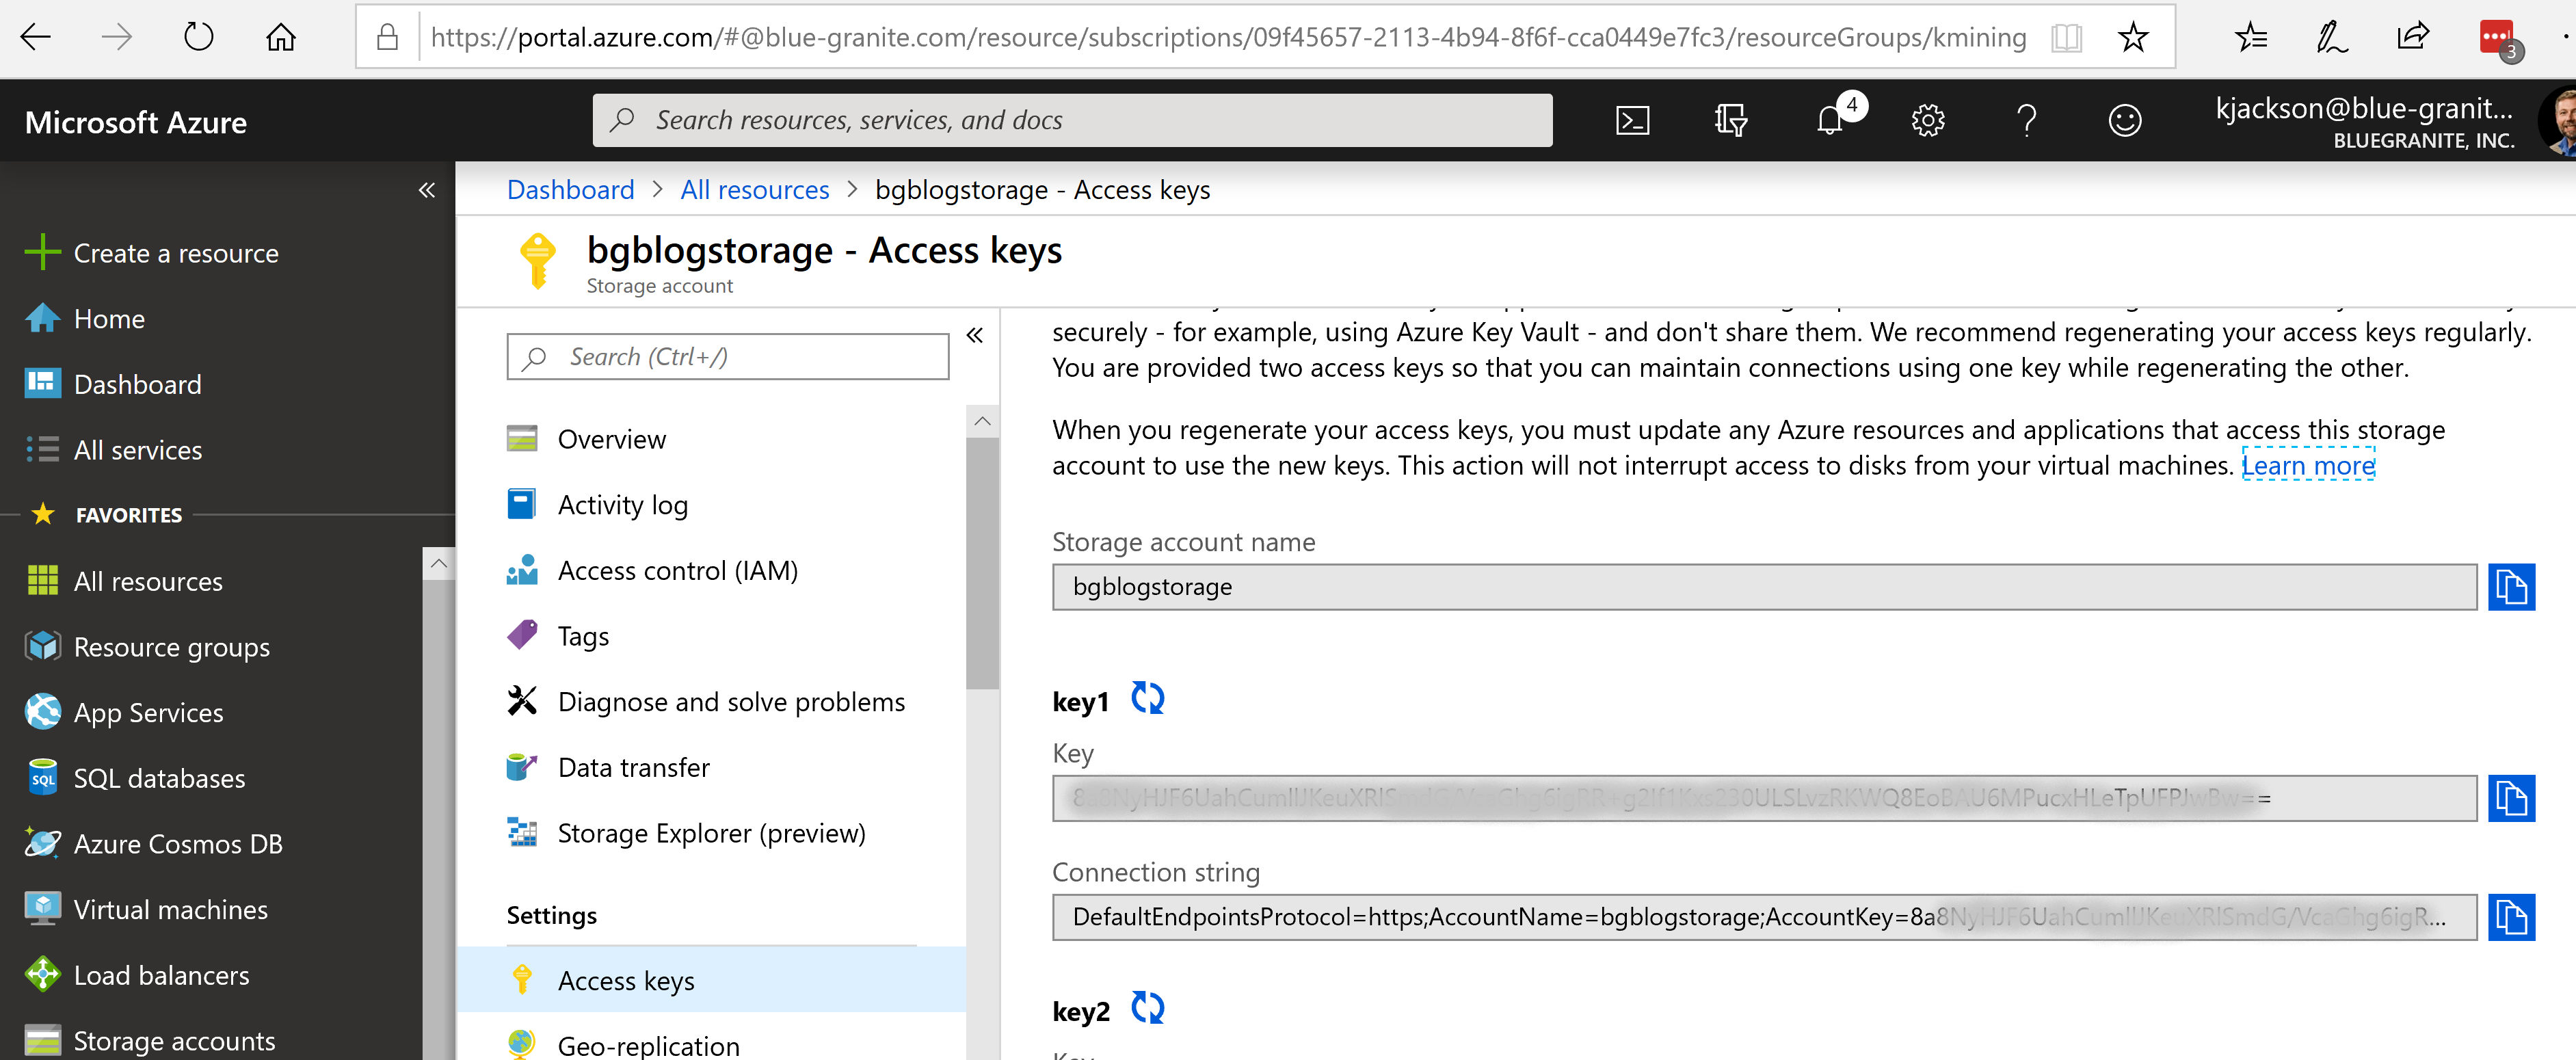
You can get the connection string to your storage account by opening up your storage account, selecting Access Keys under Settings and then copying the key1 Connection string.
One last thing – to complete our Create Data source API call, we’ve got to add the headers to our call. We need to add the Content-Type and the api-key.
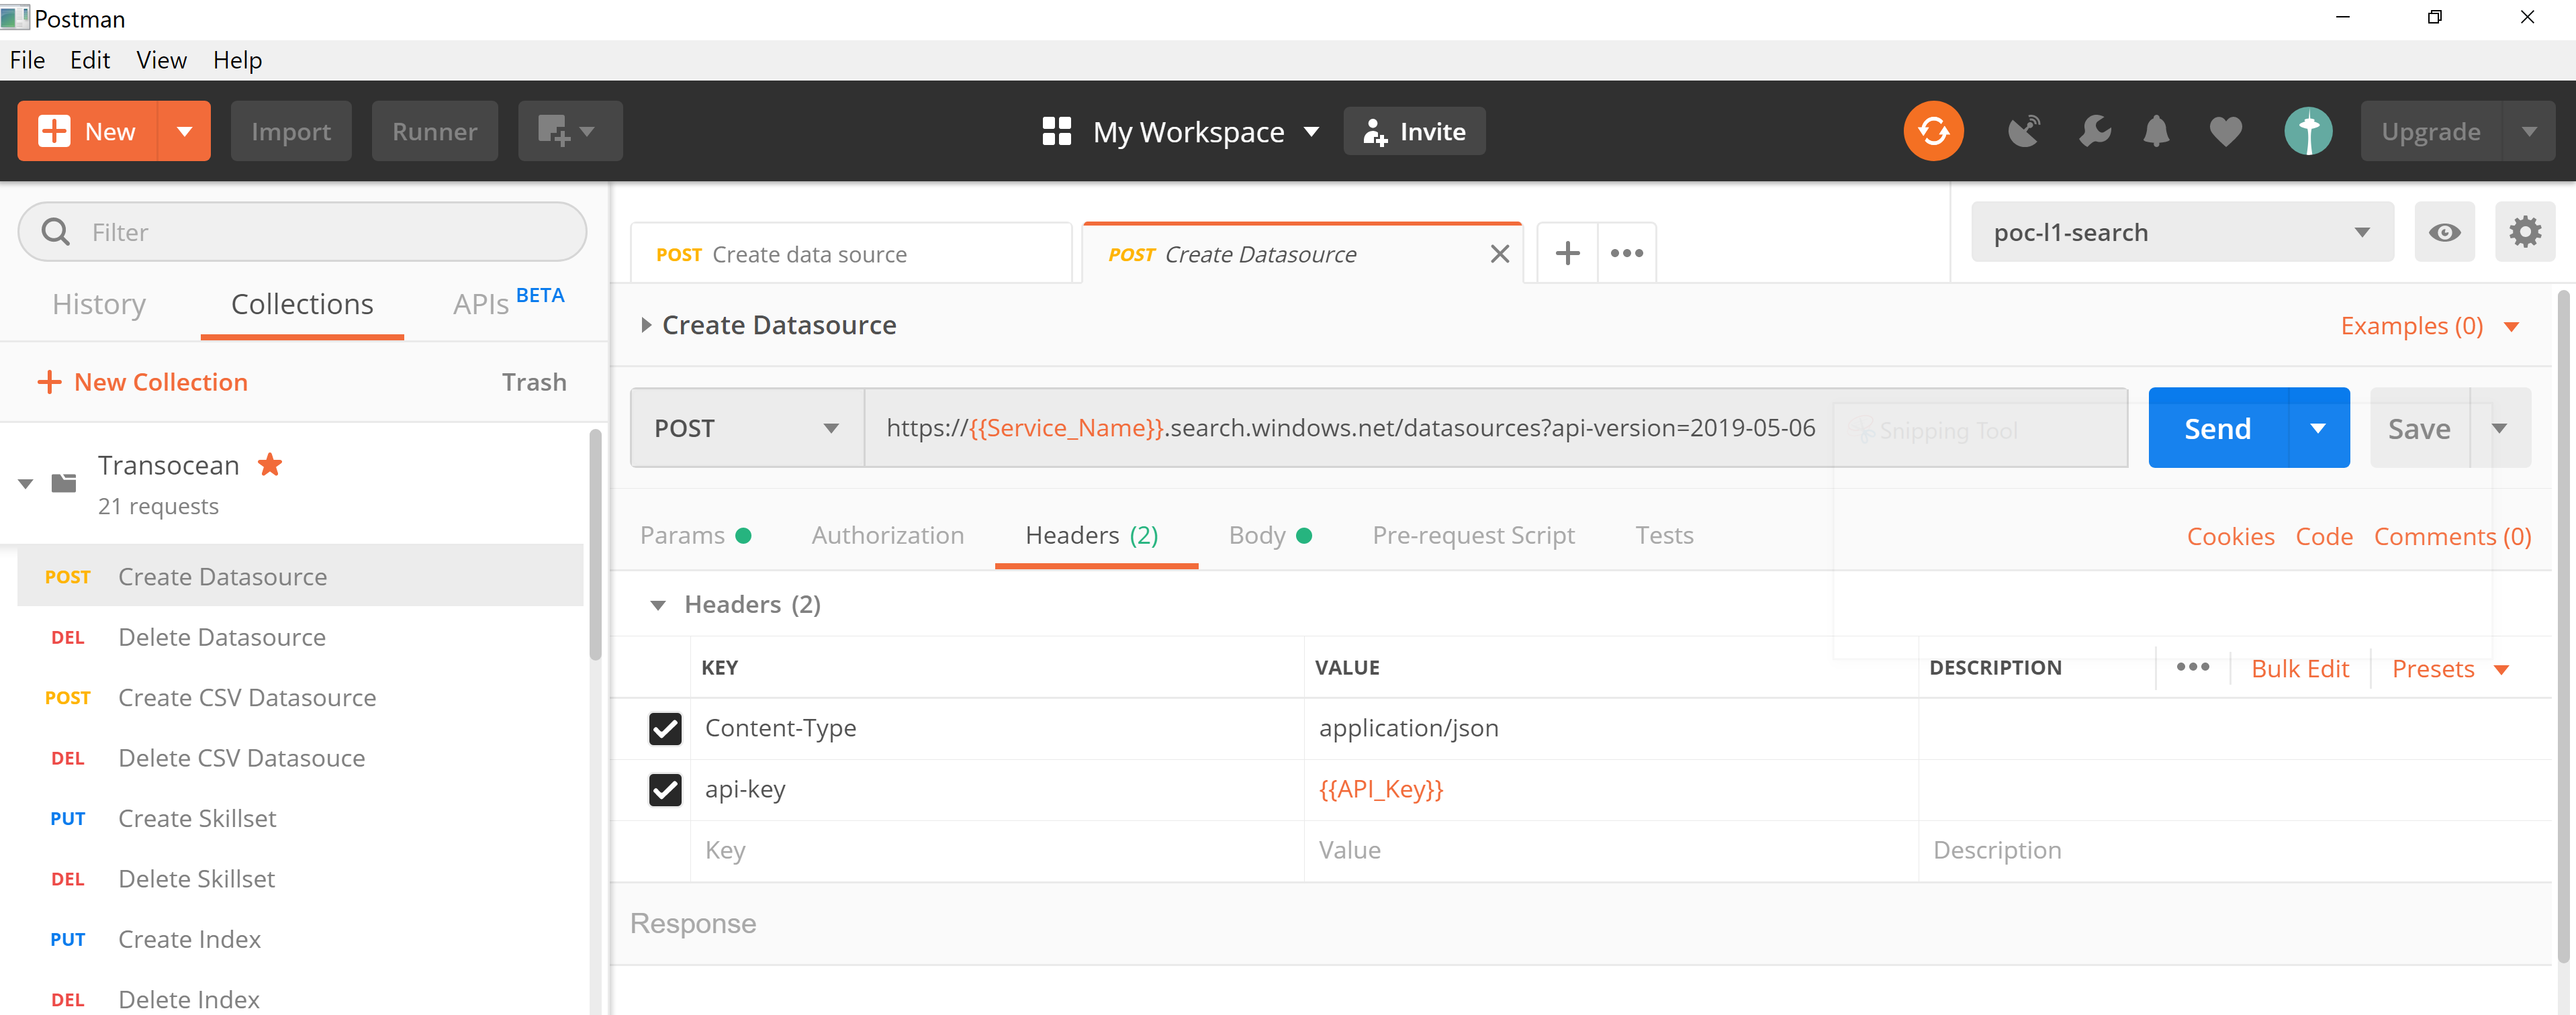
You can get the API Key from your Search Service. Select your Search Service and then select Keys under Settings and copy the Primary admin key.

Once you copy the Search Service key into the header of your API call, you should be all set. Here’s what my call looks like in Postman:
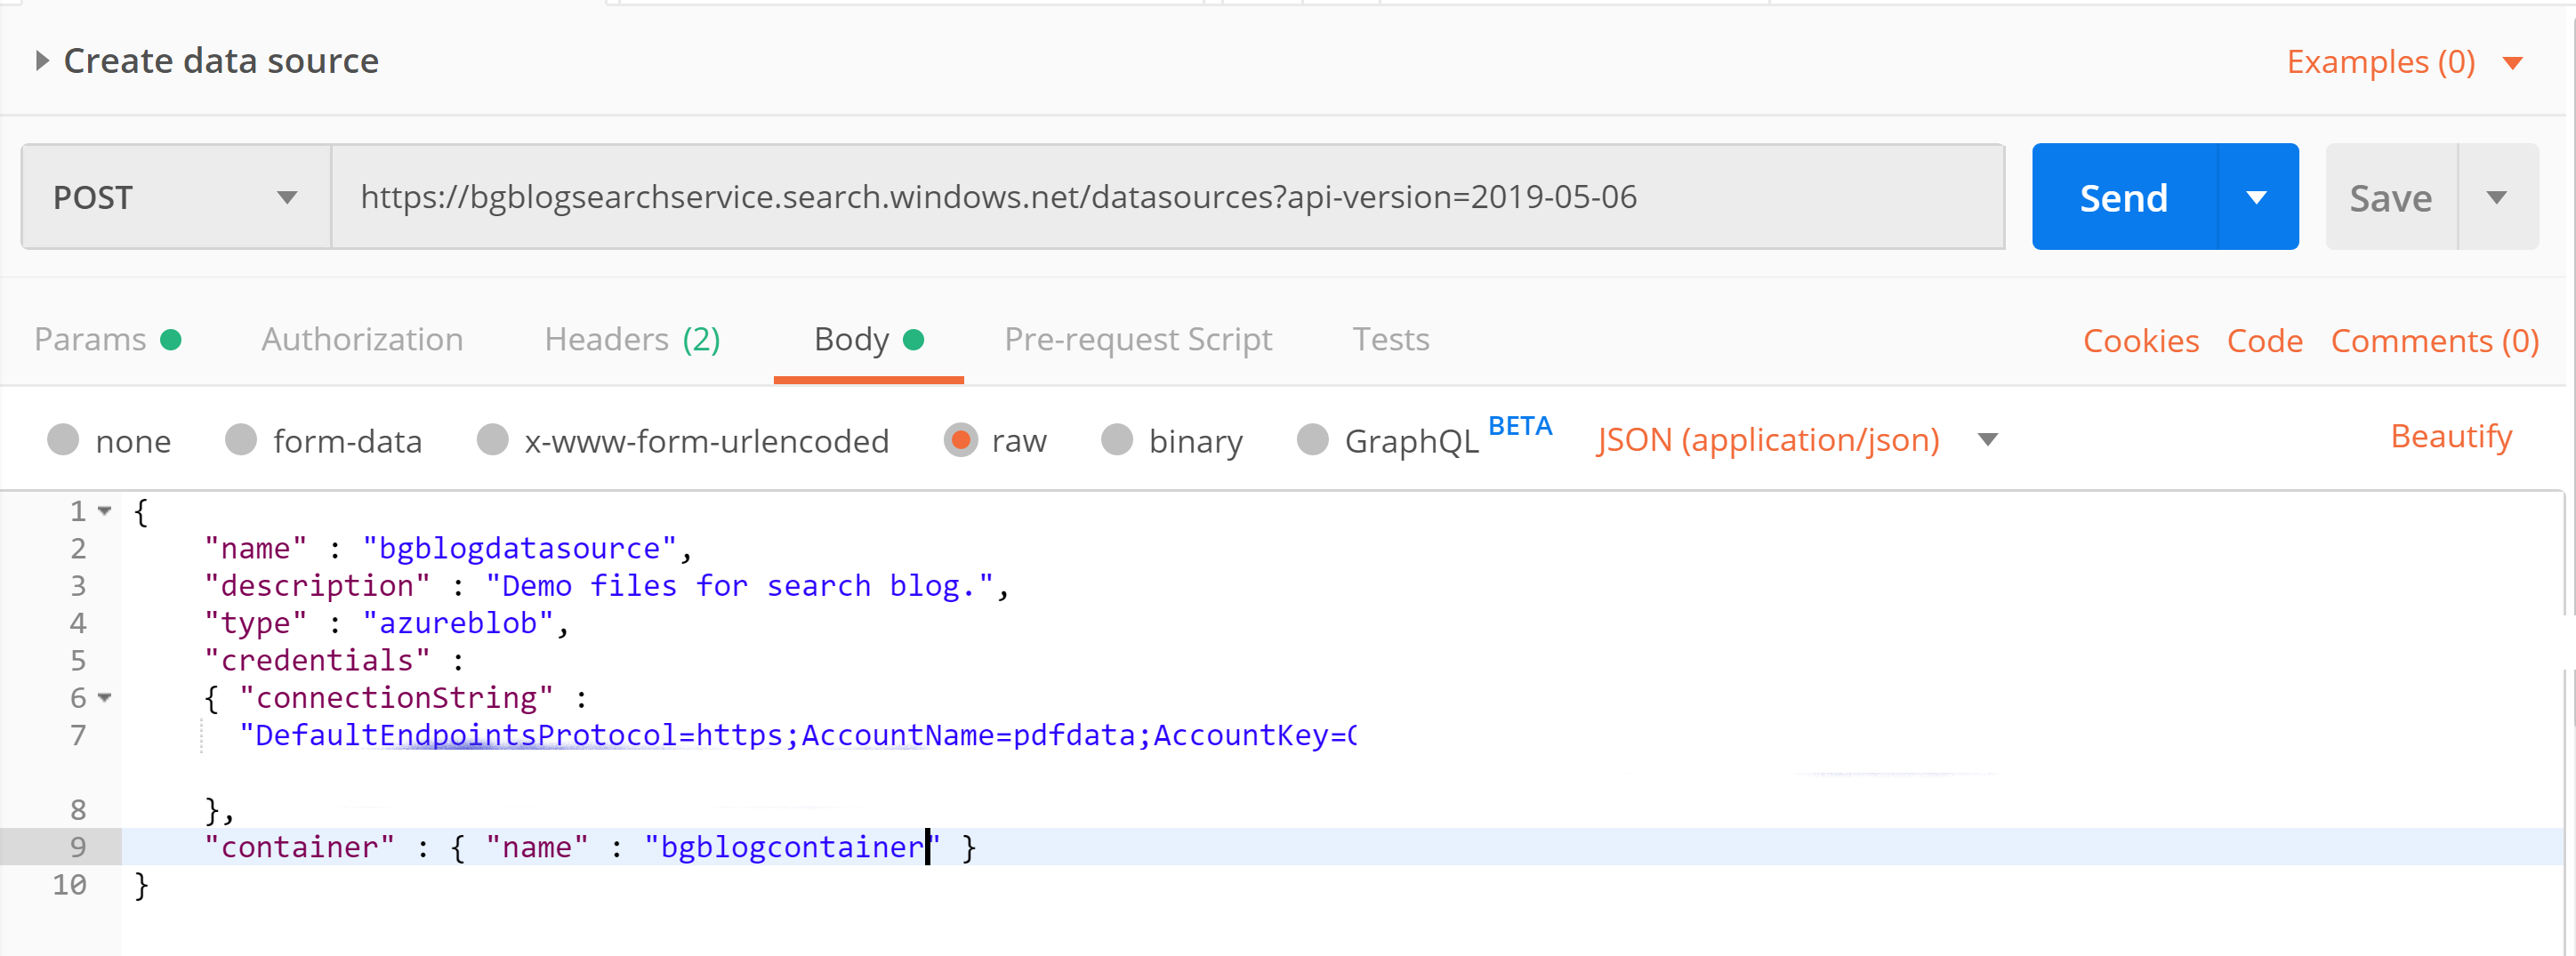
Just hit Send and you should see a result something like this:
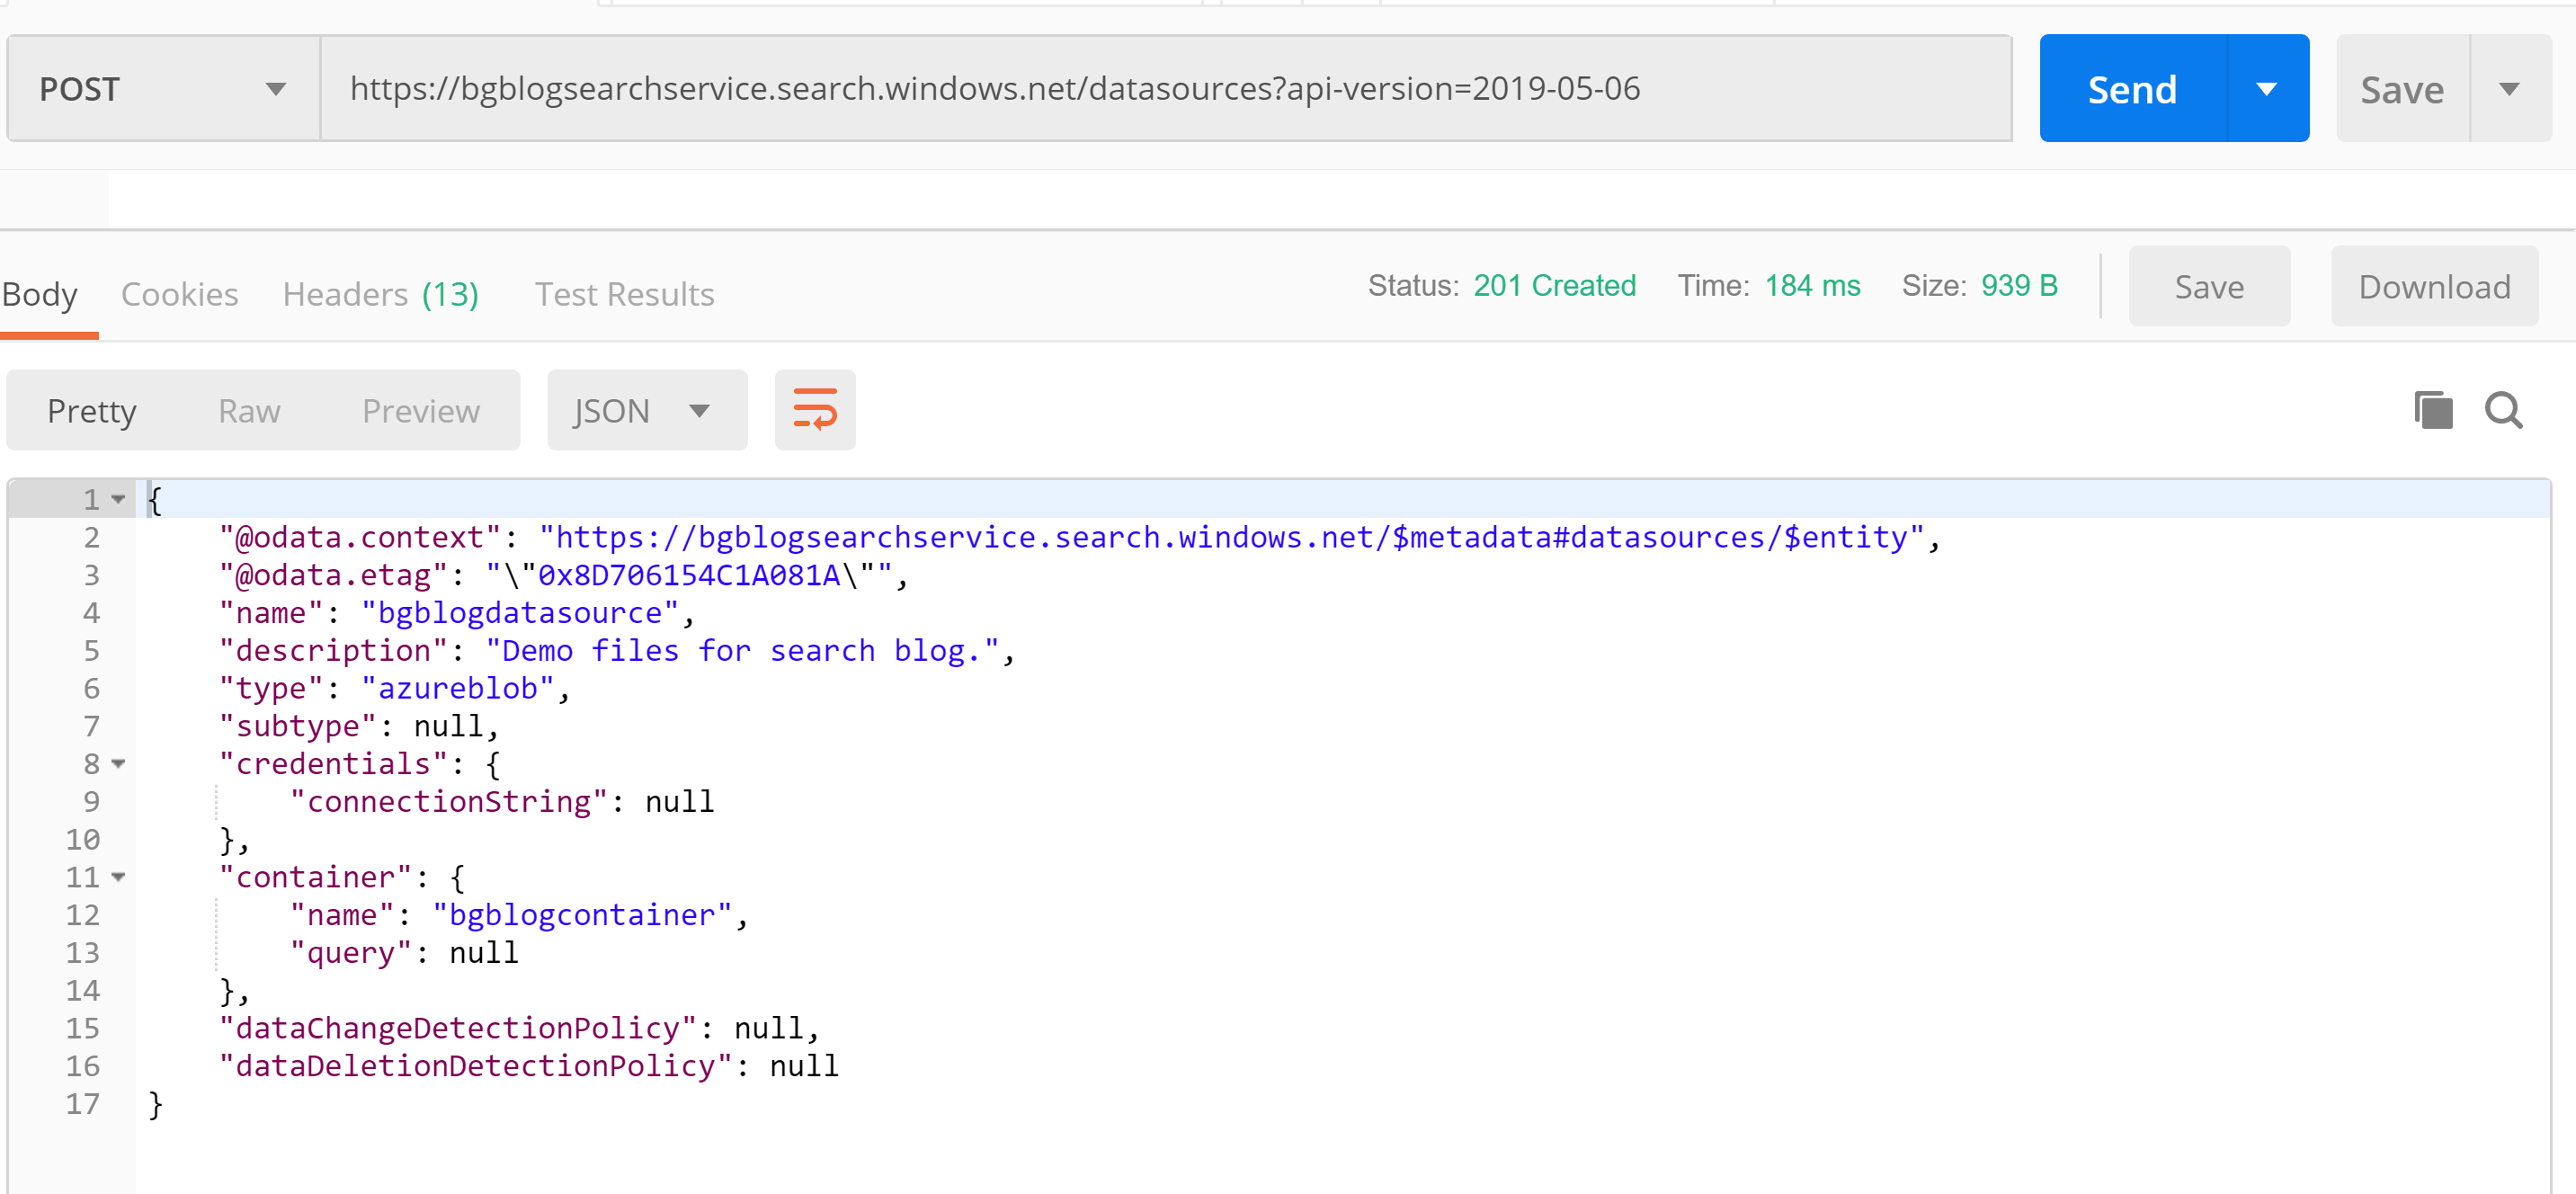
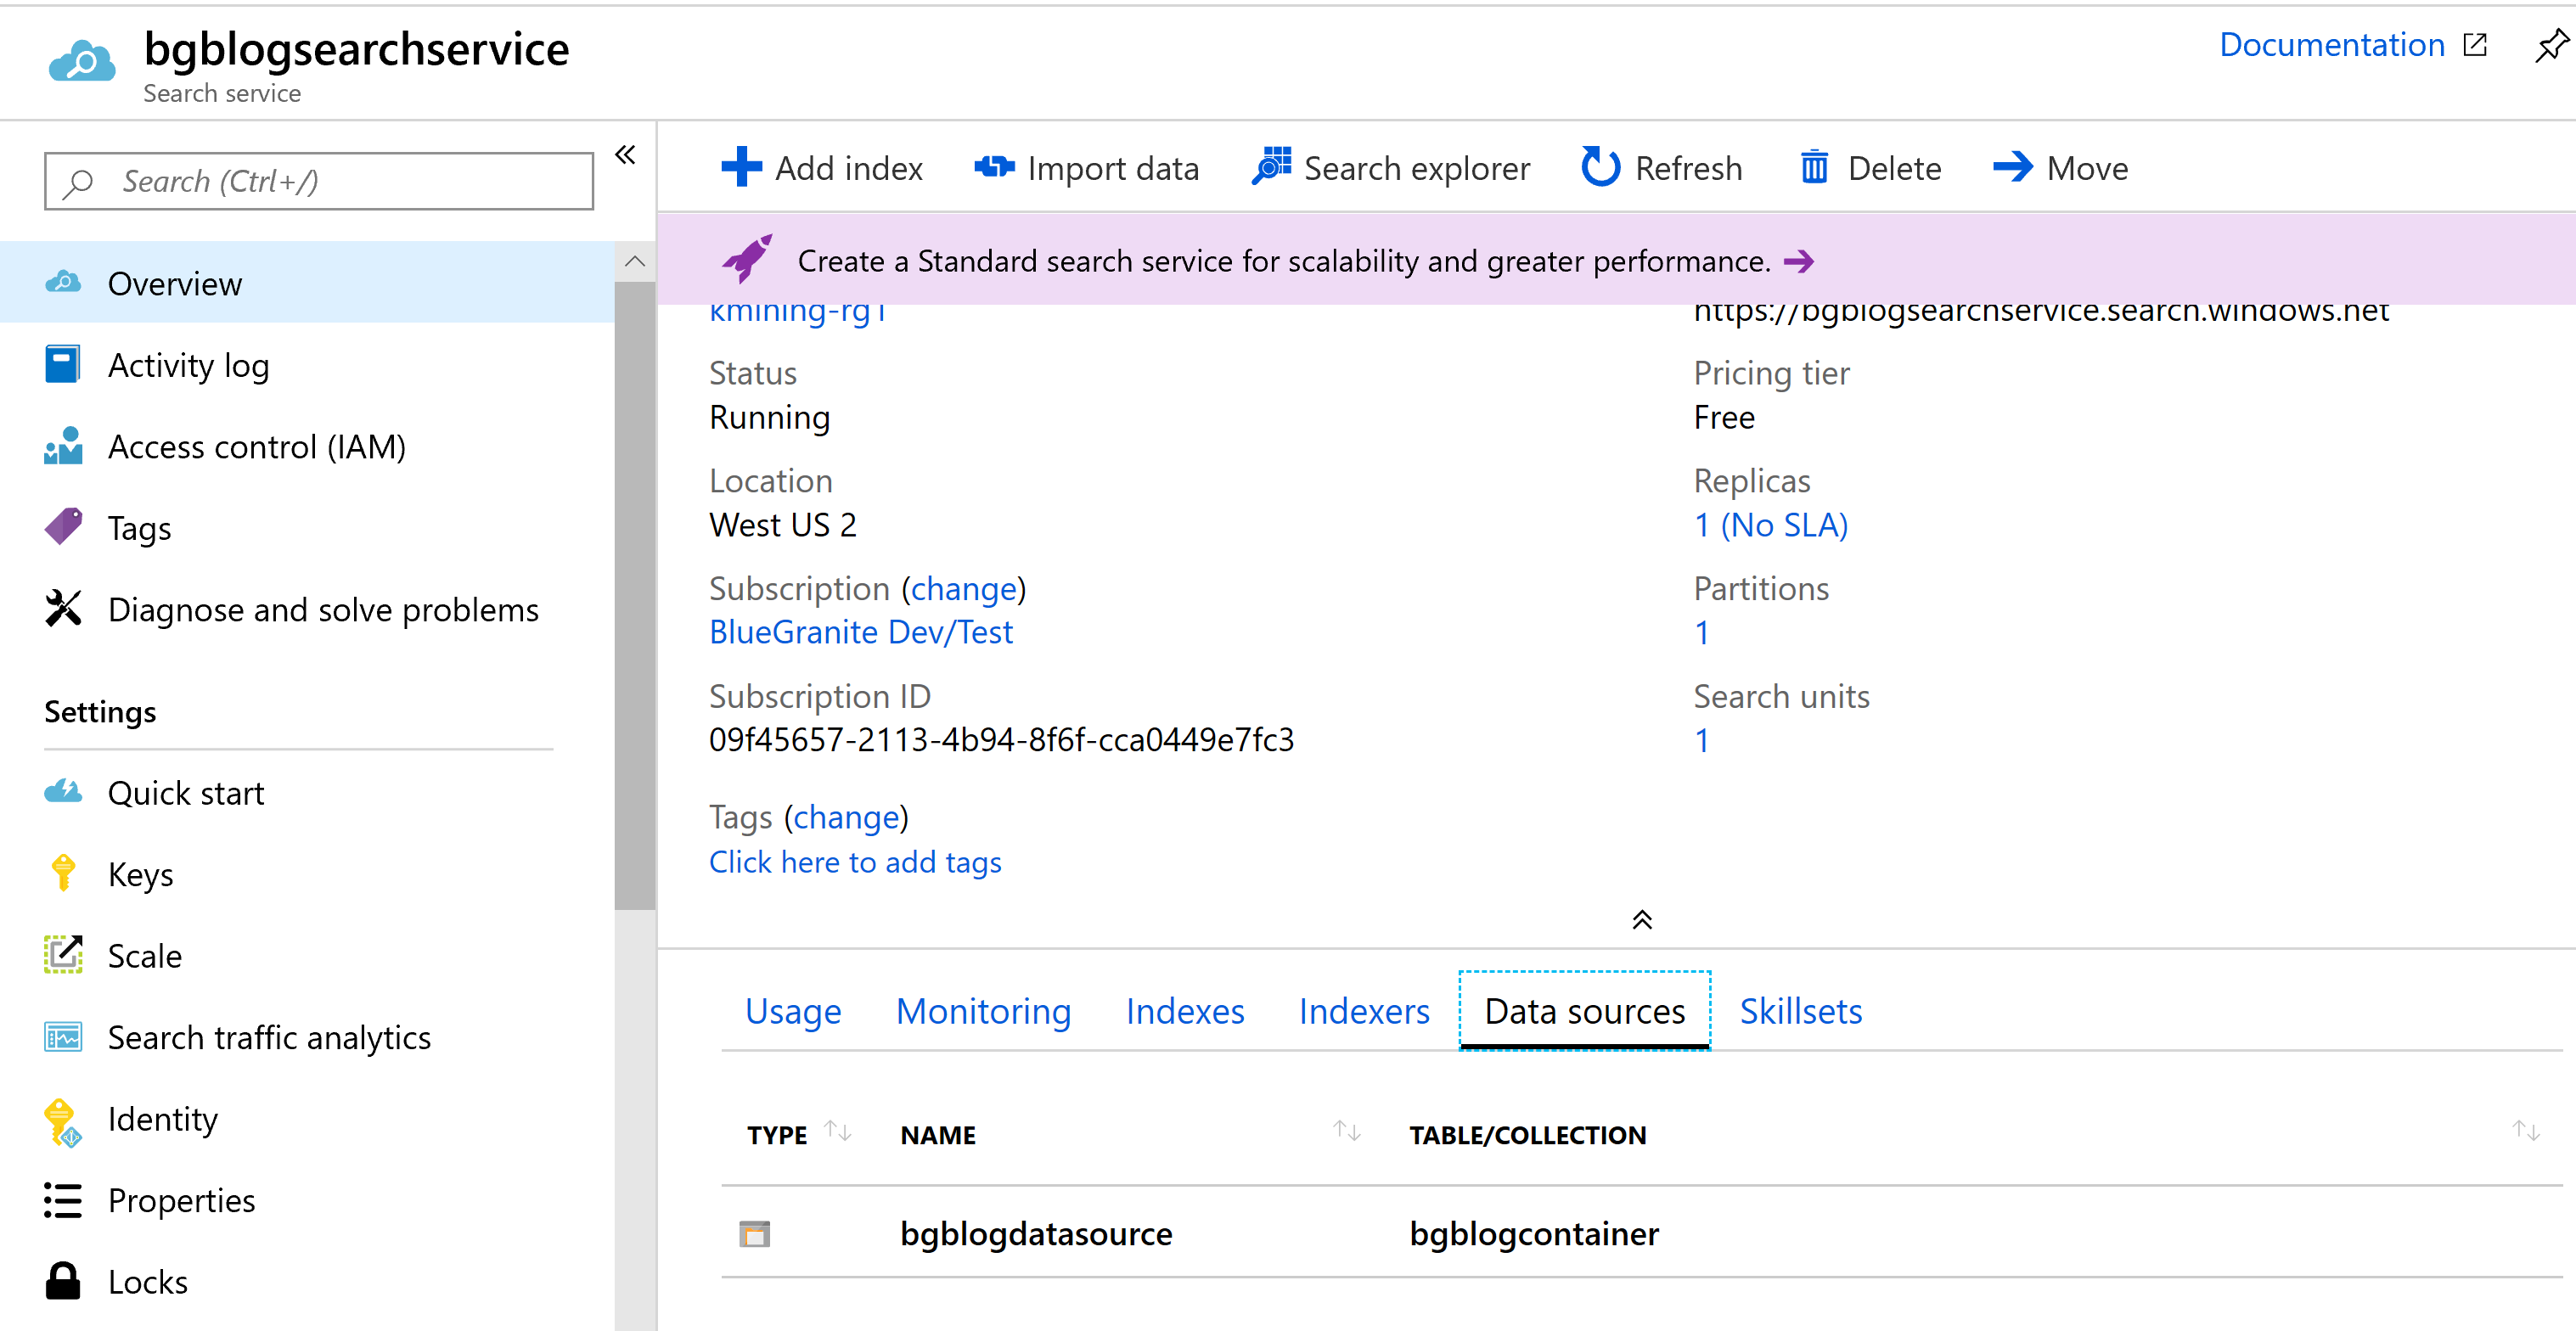
If you don’t trust the API response, you can go to your Search Service in the Azure Portal and verify that that data source has been created.
In case you ever need it, you can delete your data source via an API call using the following format:
DELETE https://[Search_Service_Name].search.windows.net/datasources/[Data_Source_Name]?api-version=[api-version]
Creating an Index
Think of the Index as the definition of the data in our data source; how it will be searched, and how results will be returned. The format for the API call to create an Index is:
POST https://[Search_Service_Name].search.windows.net/indexes?api-version=[api-version]
Where [Search_Service_Name] is the name of your Search Service, [Index_Name] is the name of your Index, and [api-version] is the version of the API you are using. “2019-05-06” is the most current production version as the writing of this post.
Using my Search Service named ‘bgblogsearchservice’ and an Index named ‘bgblogindex’, my call would be:
POST https://bgblogsearchservice.search.windows.net/indexes?api-version=2019-05-06
Note that you can update an existing Index by using the following PUT format. PUT will create the given Index if it does not already exist:
PUT https://[Search_Service_Name].search.windows.net/indexes/[Index_Name]?api-version=[api-version]
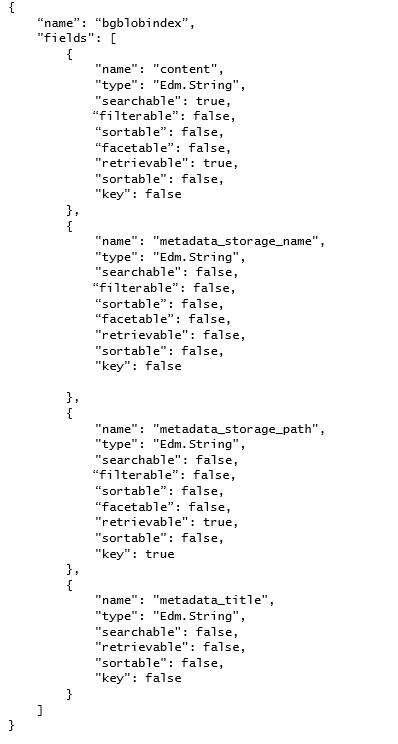
The body for our Index POST is a bit longer than that of the Data source POST, but it’s not too bad. We need to name our Index and define each field that will be in our Index. The format of each field definition will be:
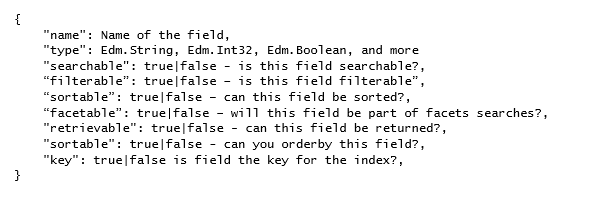
This is an example subset of commonly used field definitions; there are many more. For a full reference of available Index field definitions, see here.
A pretty simple and standard definition of an Index may look like this:
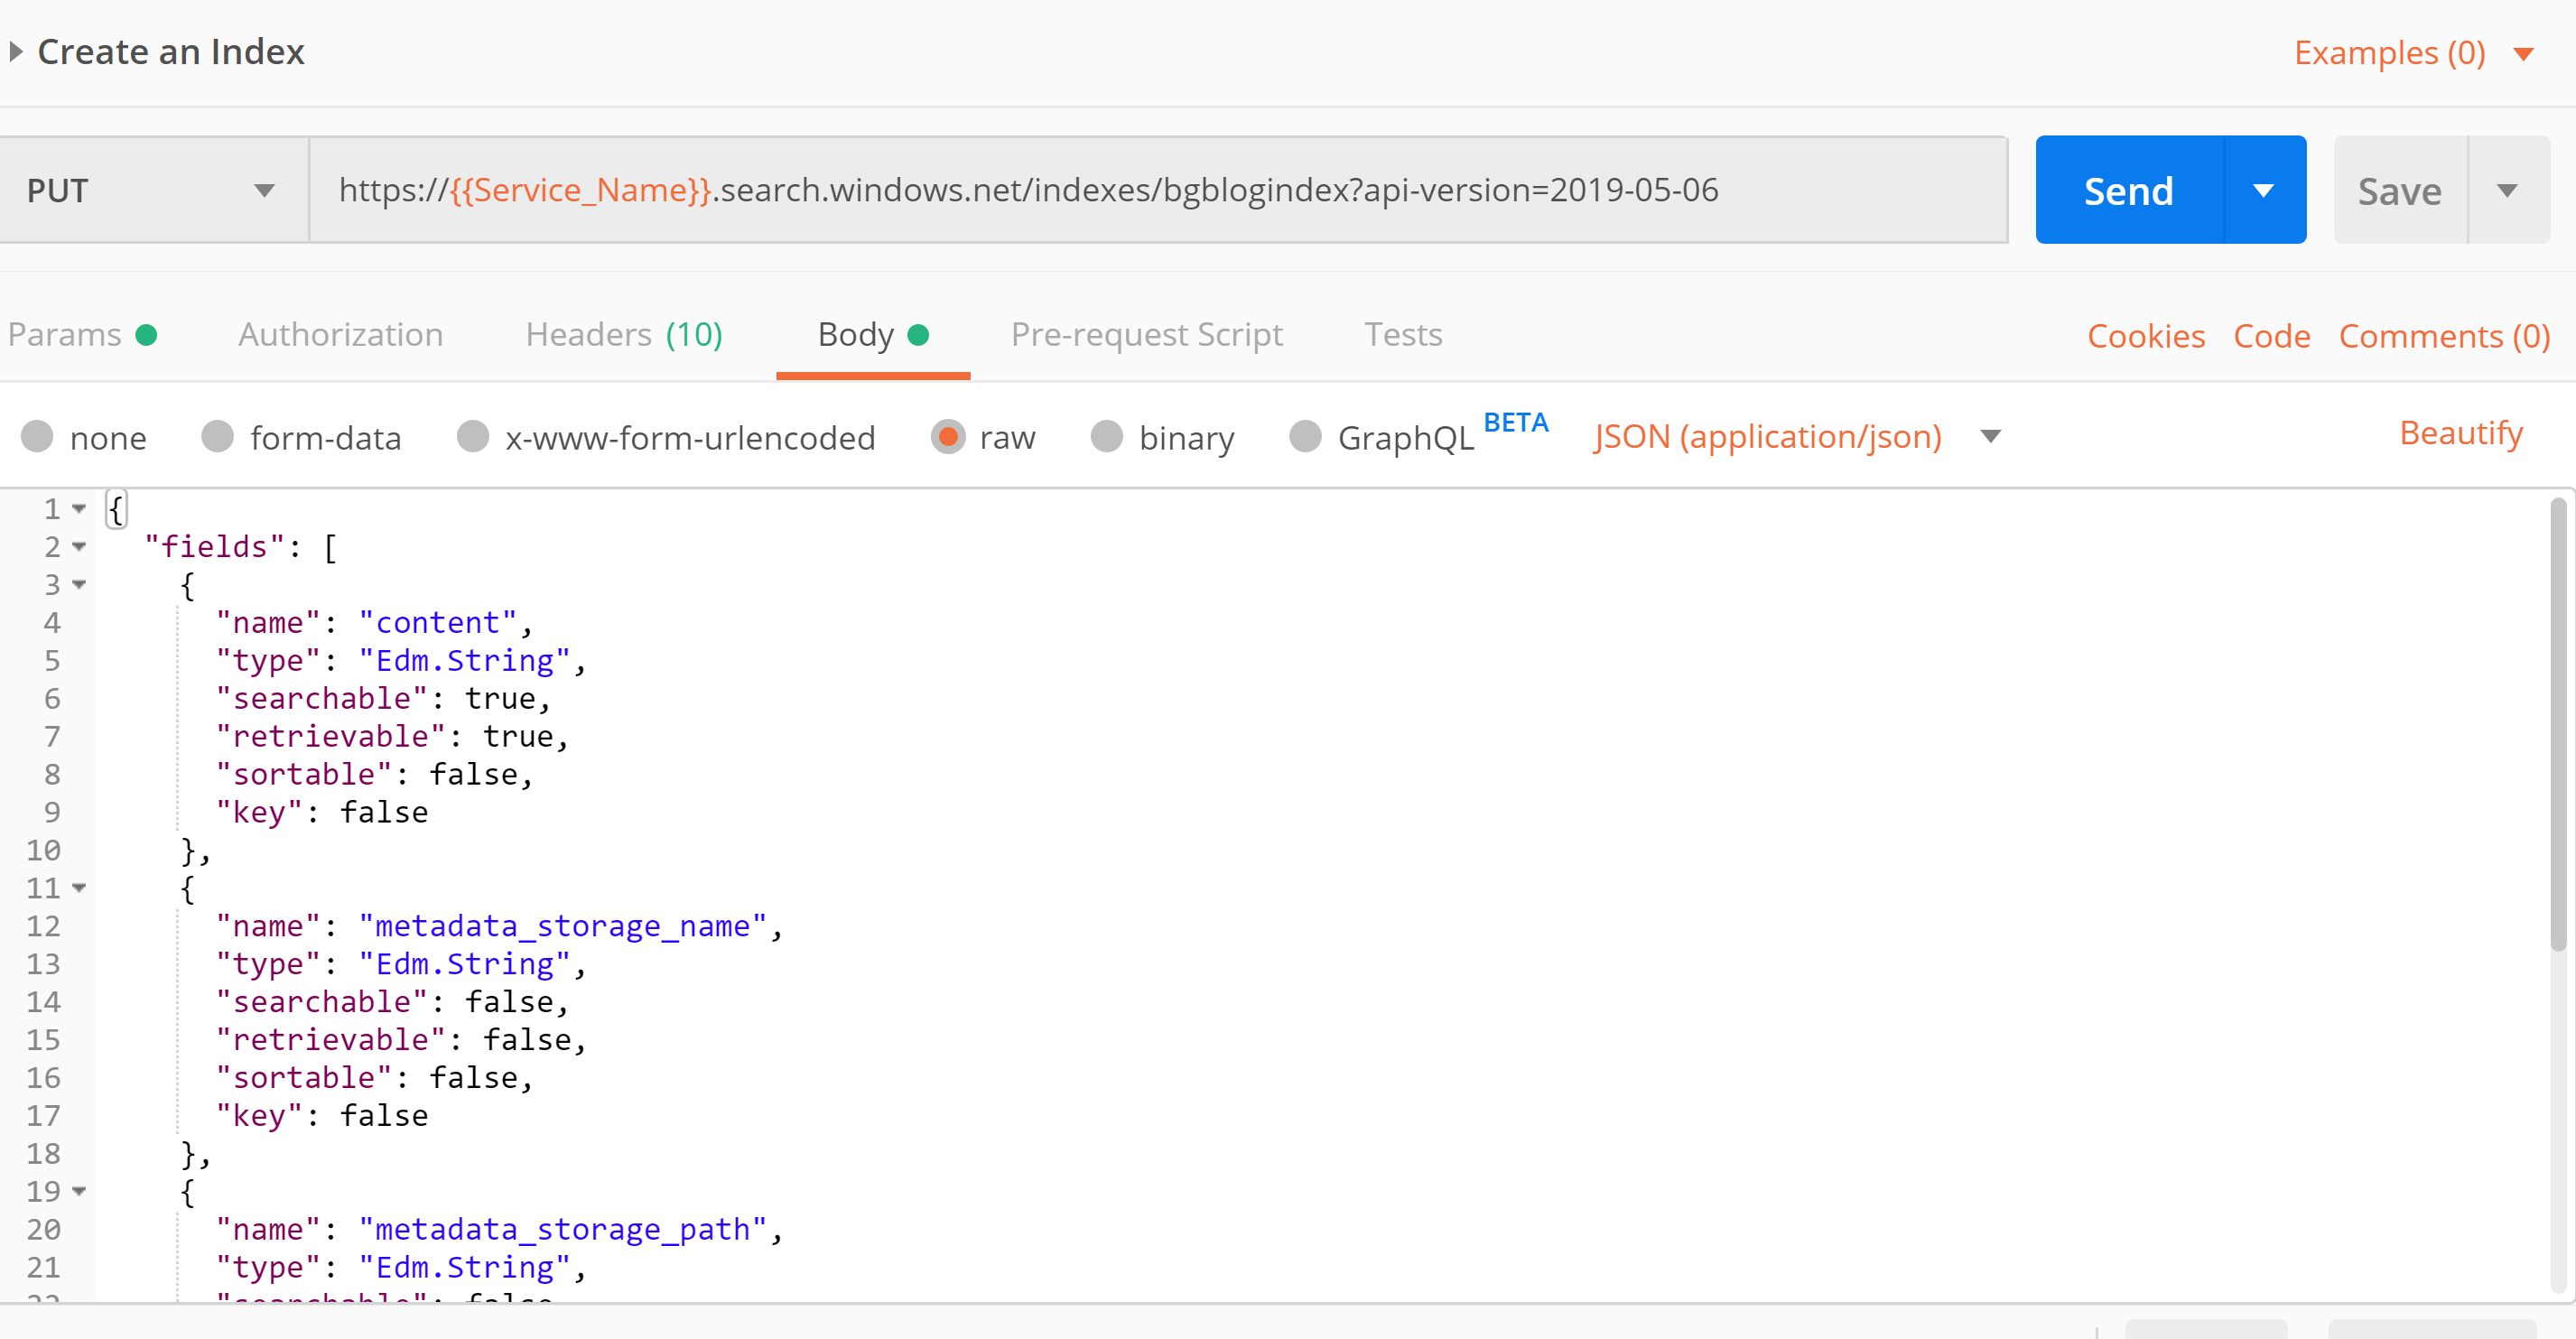
We can use the above JSON as our Create Index POST. Don’t forget to add the Headers with the Content-Type and the api-key values.
Here’s what mine looks like in Postman:
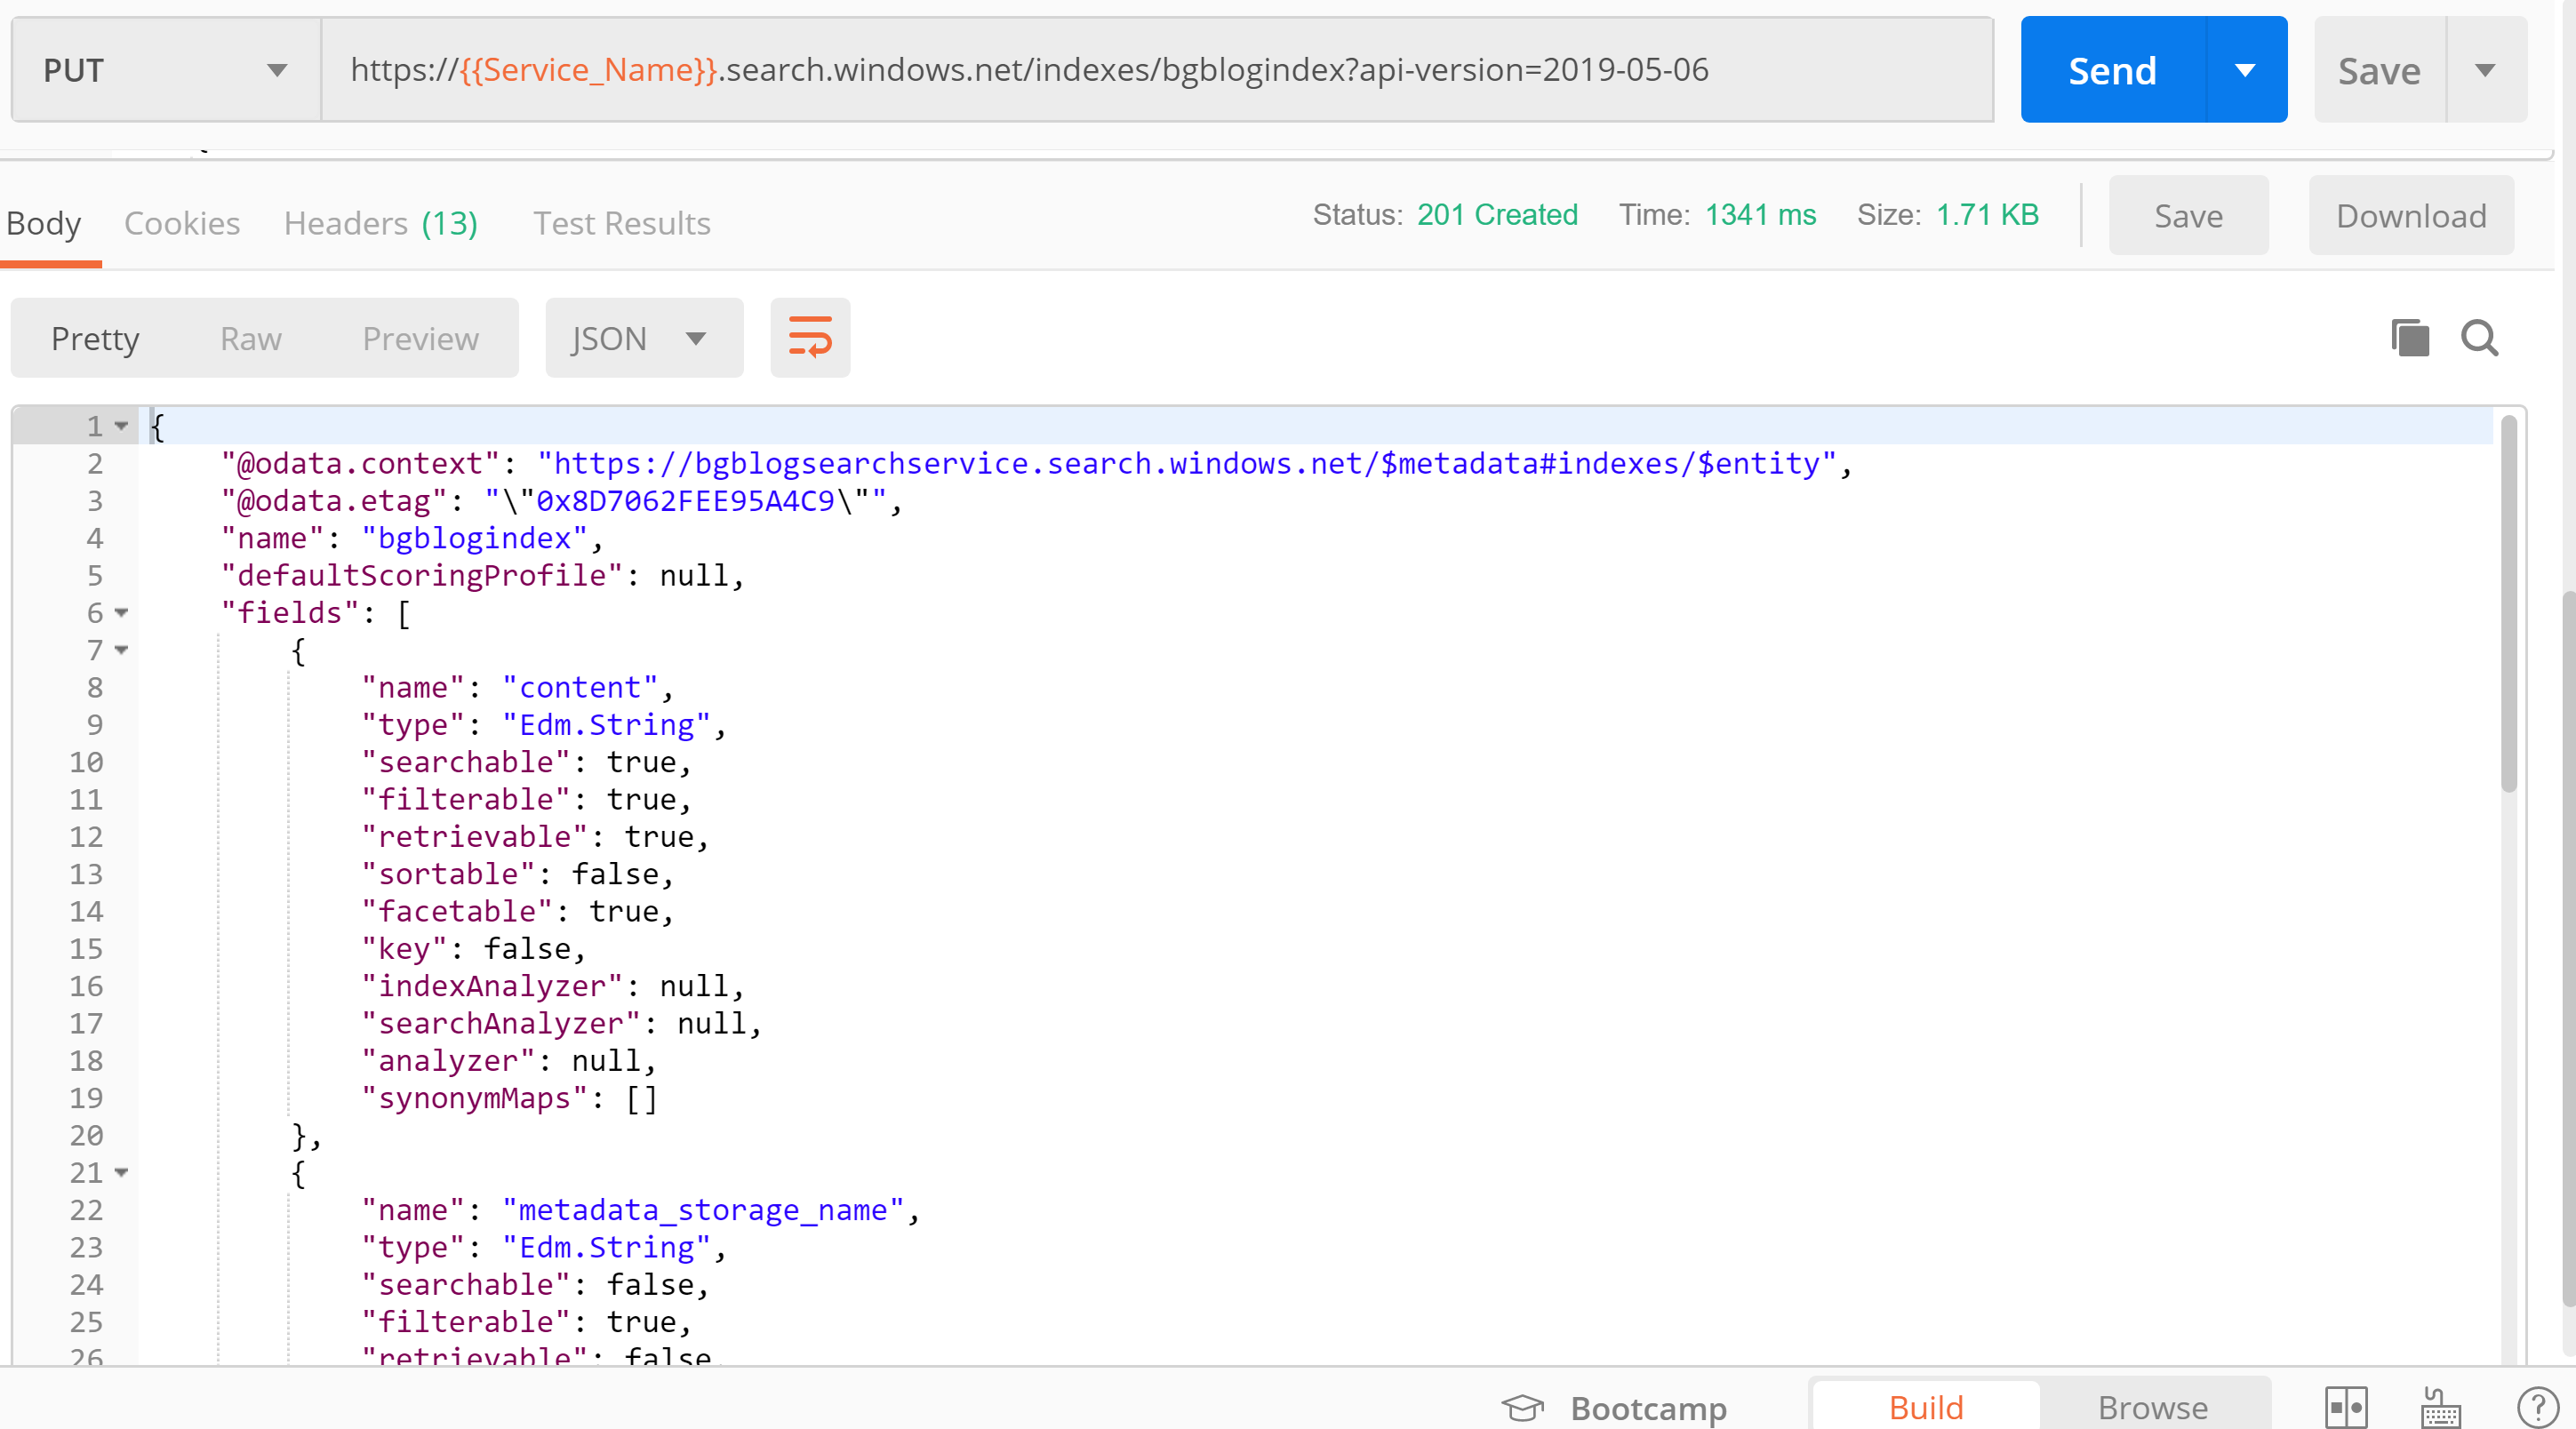
Hit the Send button and you should get a result like this:
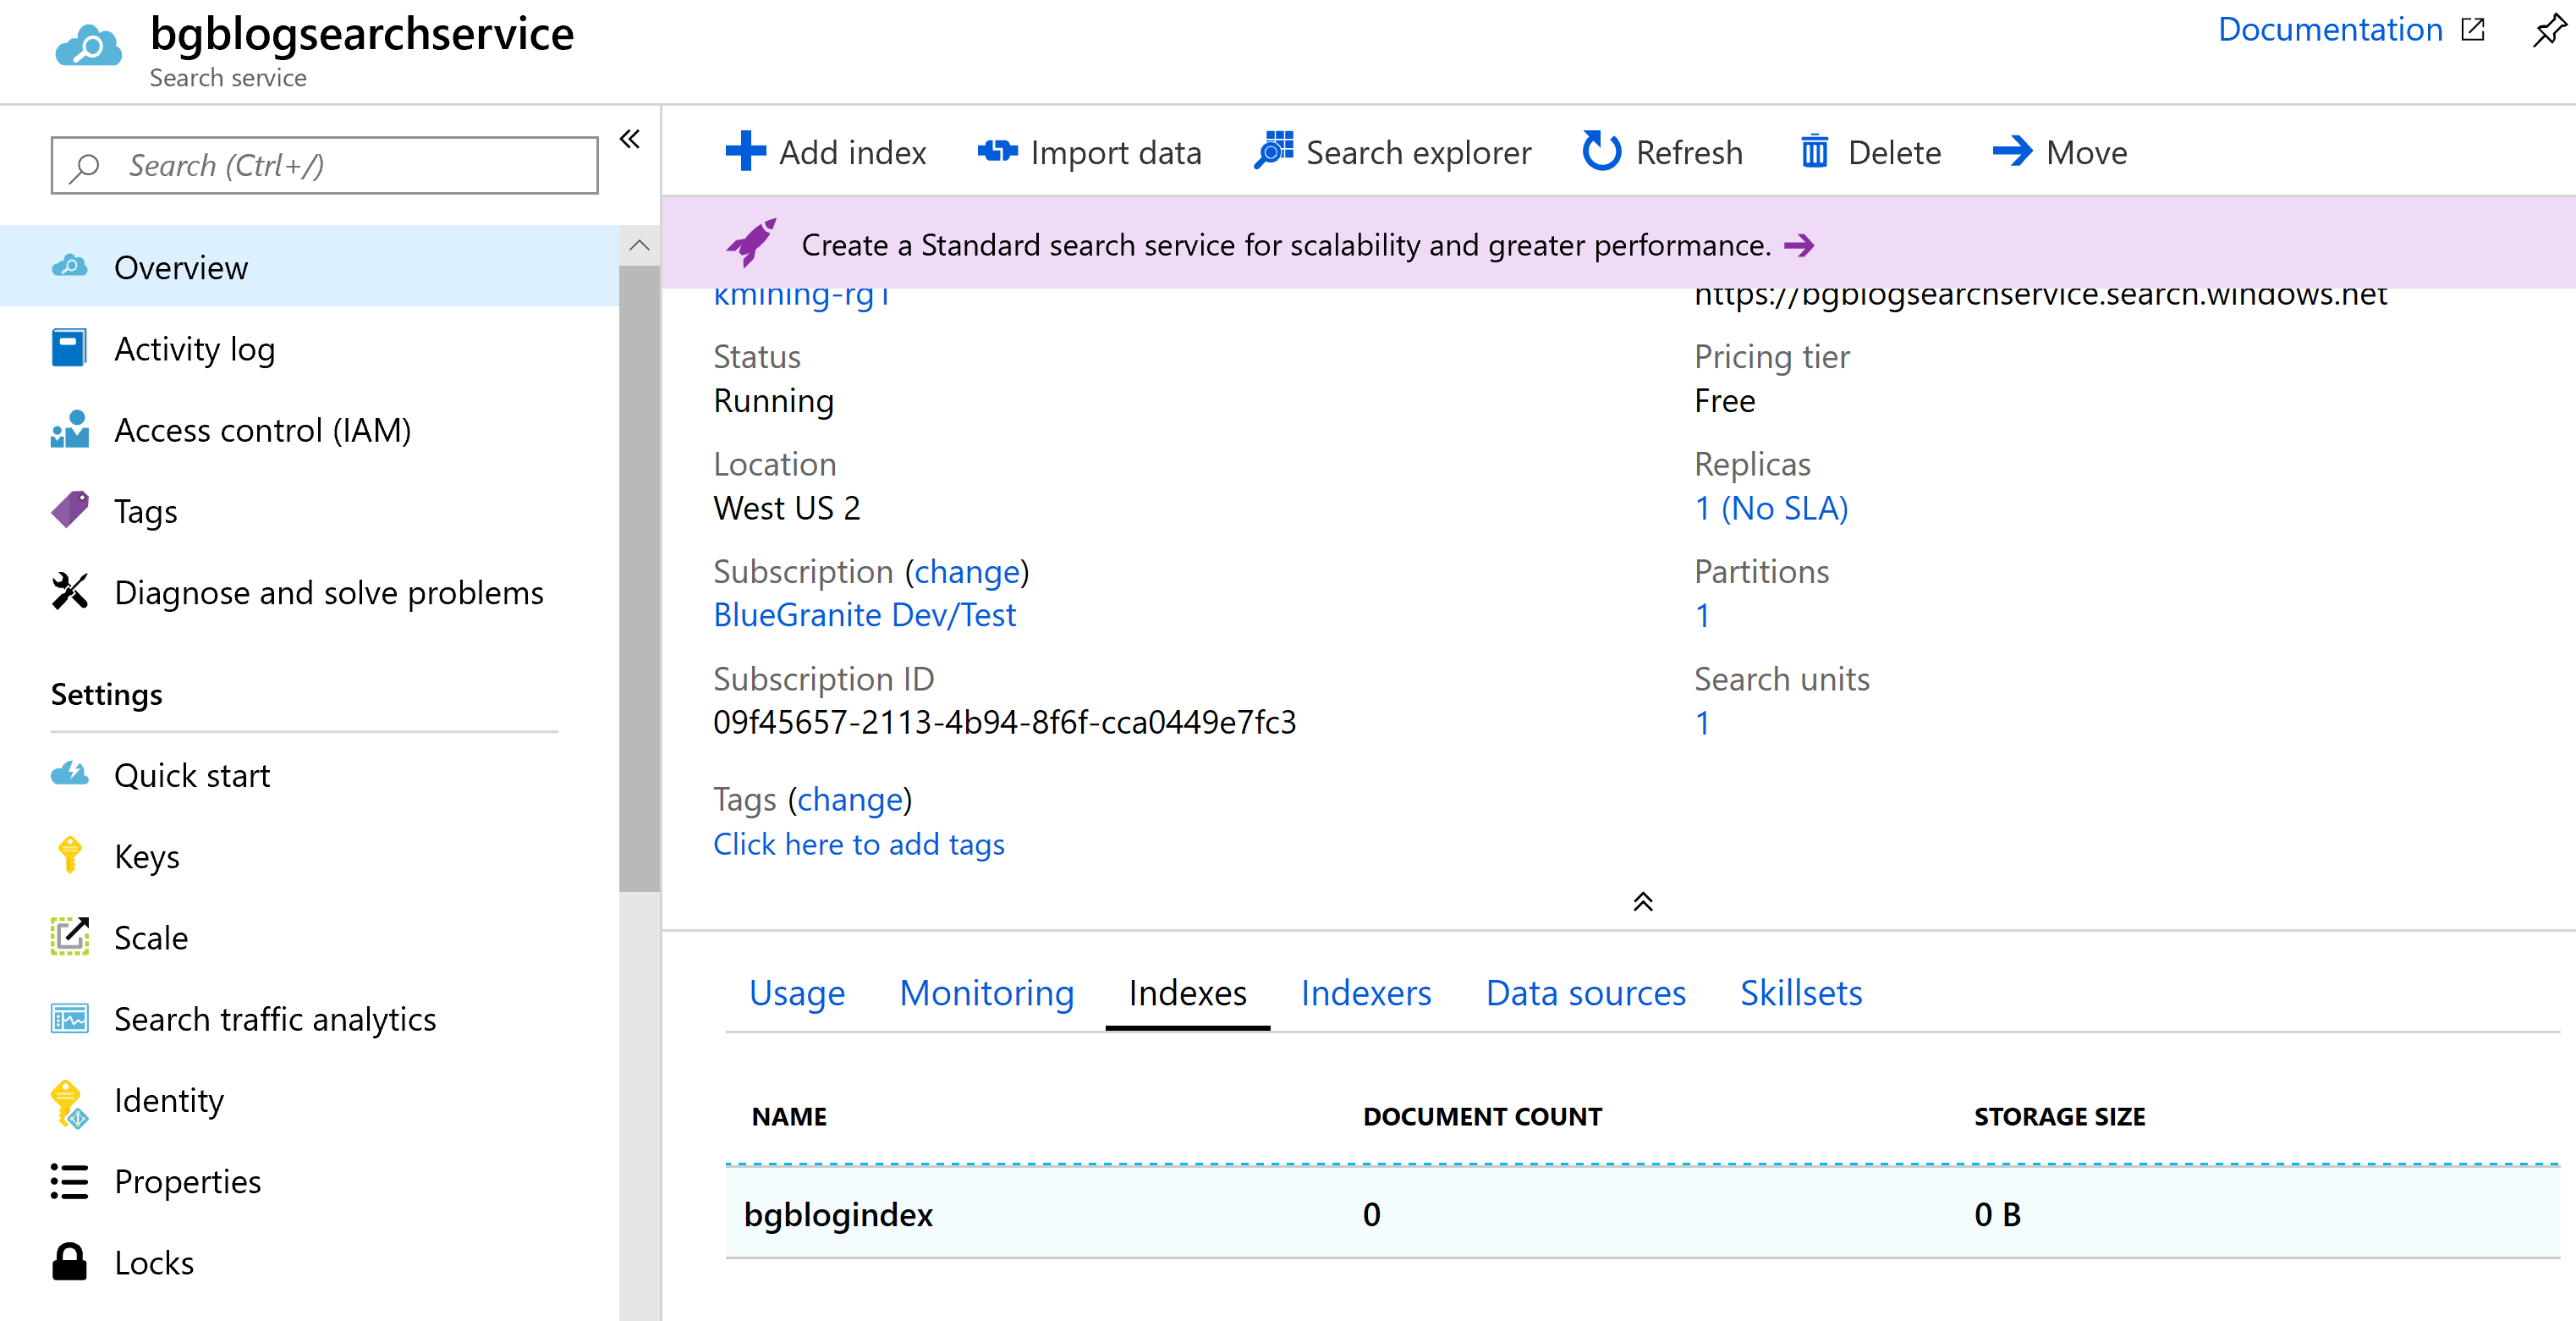
We know that with this response, the Index was created, but we can verify that by going to our Search Service on the Azure Portal and finding the Index:
In case you ever need it, you can delete your Index via an API call using the following format:
DELETE https://[Search_Service_Name].search.windows.net/indexes/[Index_Name]?api-version=[api-version]
Creating an Indexer
The Indexer is utility that moves the raw data from your data source into your Index. The format for the API call to create an Indexer is:
POST https://[Search_Service_Name].search.windows.net/indexers?api-version=[api-version]
Where [Search_Service_Name] is the name of your Search Service and [api-version] is the version of the API you are using. “2019-05-06” is the most current production version as the writing of this post.
Using my Search Service named ‘bgblogsearchservice’ and an Indexer named ‘bgblogindexer’, my call would be:
POST https://bgblogsearchservice.search.windows.net/indexers?api-version=2019-05-06
Note that you can update an existing Indexer by using the following PUT format:
PUT https://[Search_Service_Name].search.windows.net/indexers/[Indexer_Name]?api-version=[api-version]
The body for our Indexer POST is basically a mapping from our raw data to the Index. We only need to do this if we want the name of the field in the Index to be different than the raw data. We’ll also need to use the Indexer to perform mapping functions.
Here is a basic Indexer body for our example:
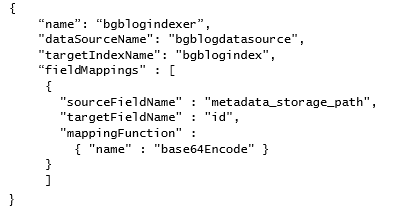
We need to name our Indexer (“name”) and then identify our Data source (“dataSourceName”) and our Index (“targetIndexName”). The rest is field mapping.
Remember in our Index definition we had a field named “metadata_storage_path”? This is a metadata field that Search gives us automatically. Common practice is to make this the unique identifier in our index, as it is guaranteed to be unique. Since “metadata_storage_path” is an odd name for an ID field, let’s rename it to “id”. We do this with the field mapping above. We also want to encode it into a number rather than a text field. We do that with the “mappingFunction” section and the “base64code” encoding function provided to us by Search.
Let’s go back to our Index definition:
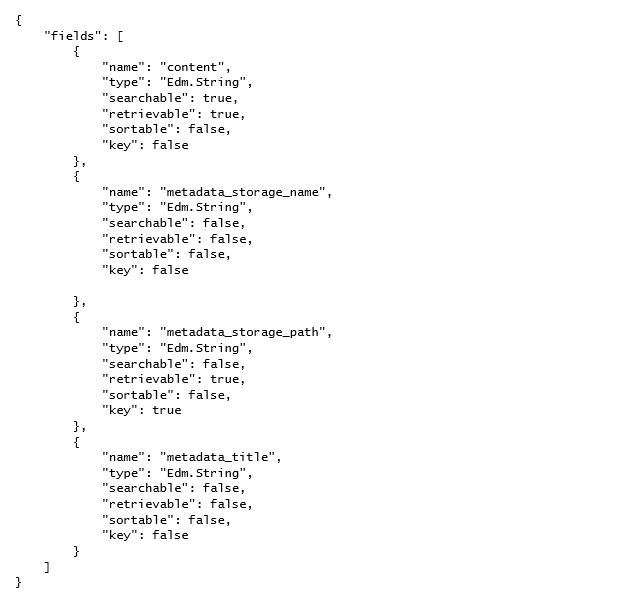
Since we’re mapping the “metadata_storage_path” field to “id” with our Indexer, we need to update our Index, or we will get an error that the “id” field does not exist on the target Index when we run our Indexer.
We must DELETE our existing Index and then recreate it with a POST call. You cannot change field names on an existing Index with a PUT call. Using the Index created earlier, we make the following API call to delete it:
DELETE https://bgblogsearchservice.search.windows.net/indexes/bgblogindex?api-version=2019-05-06
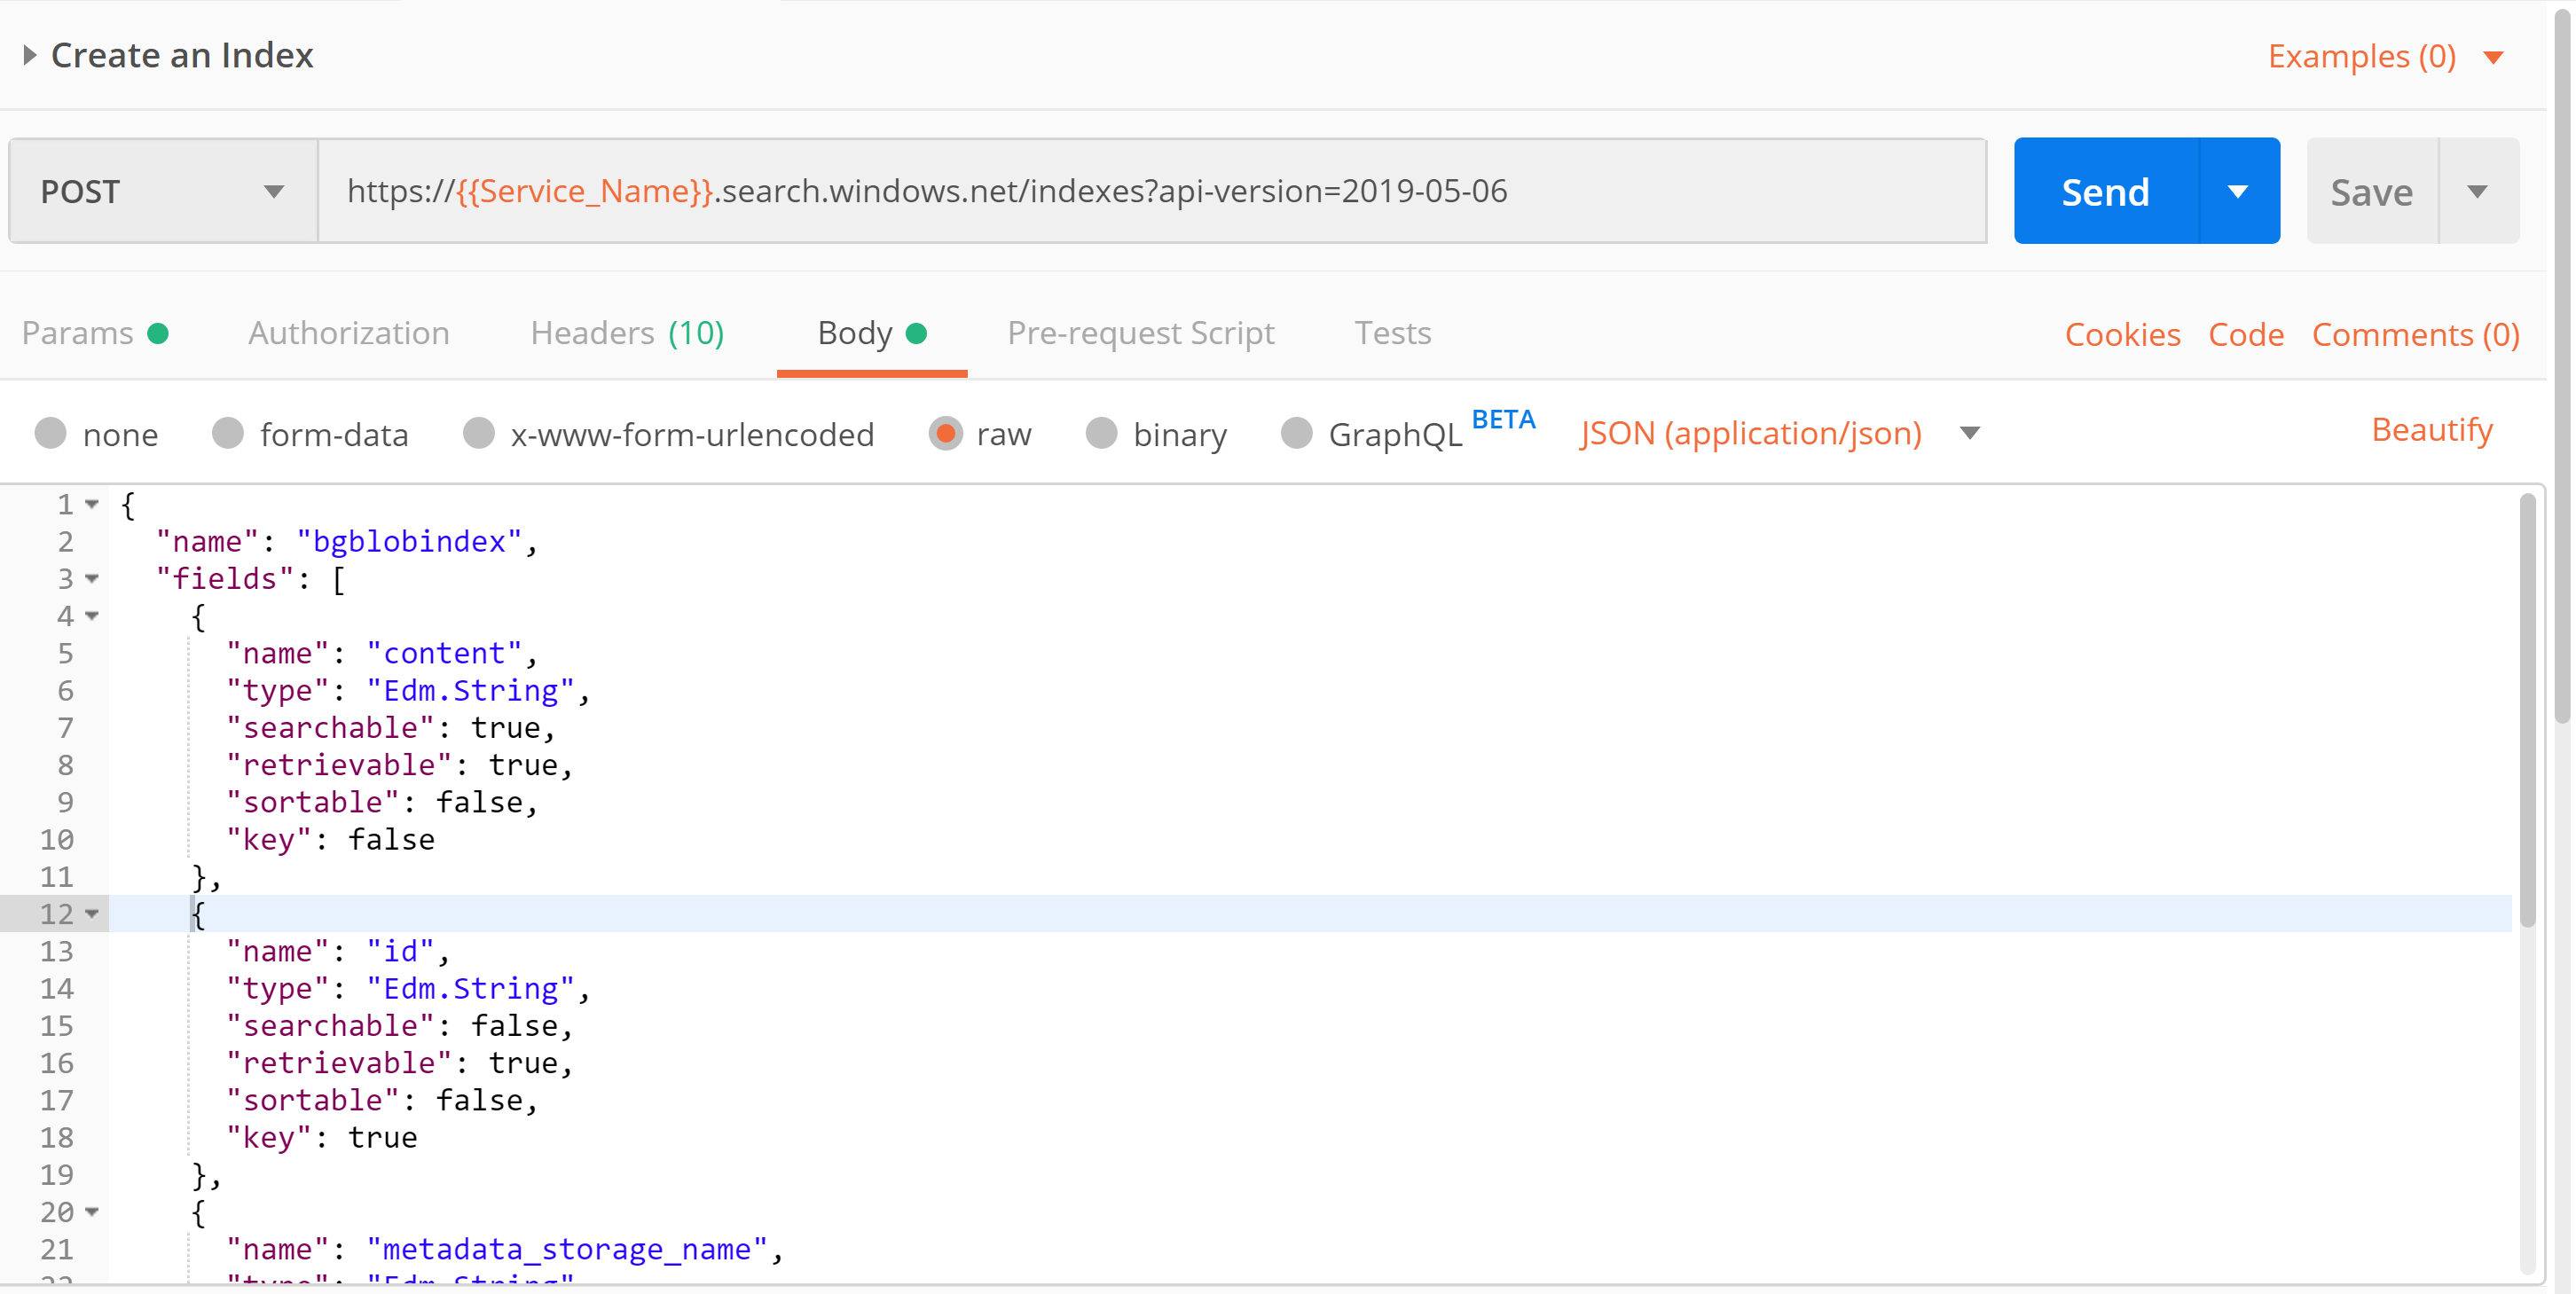
We can then make the same POST call we made earlier to create the Index, but replace the name “metadata_storage_path” with “id” in the body of the call. This is what my call looks like in Postman:
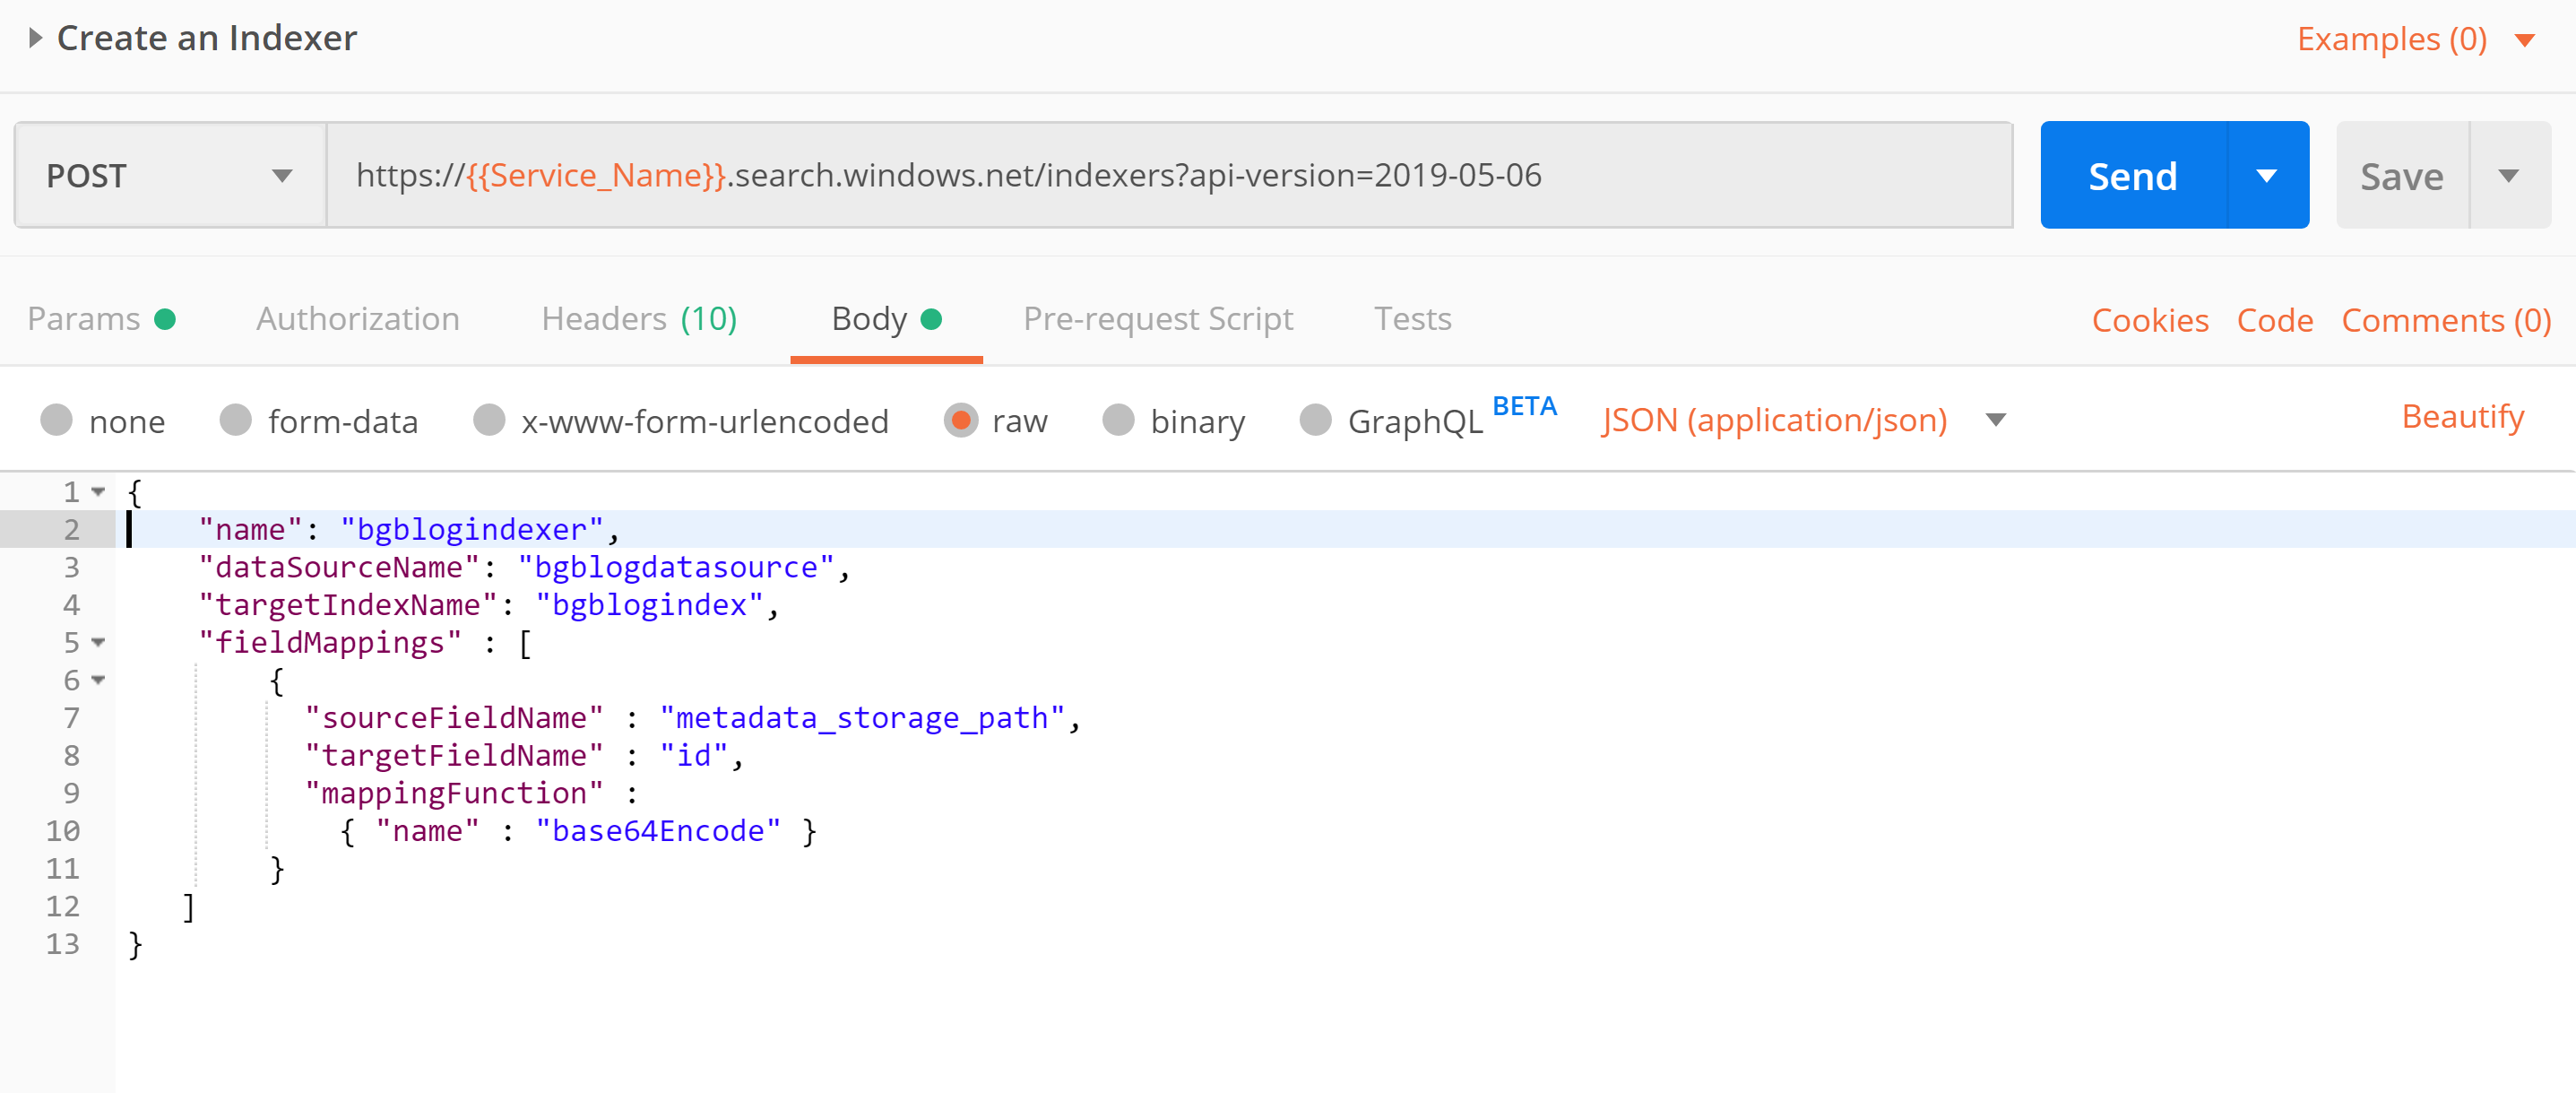
Now we are set to run our Indexer using the mapping we defined earlier. Don’t forget to add the api-key and the Content-Type to the header. This is what my call looked like in Postman:
Not only does the create Indexer call create the Indexer, it also runs it. This can take some time. You can check the status of the Indexer from the Azure Portal Search Service Overview page, or you can make the following API Call:
GET https://[Search_Service_Name].search.windows.net/indexers/[Indexer_Name]/status?api-version=[api-version]
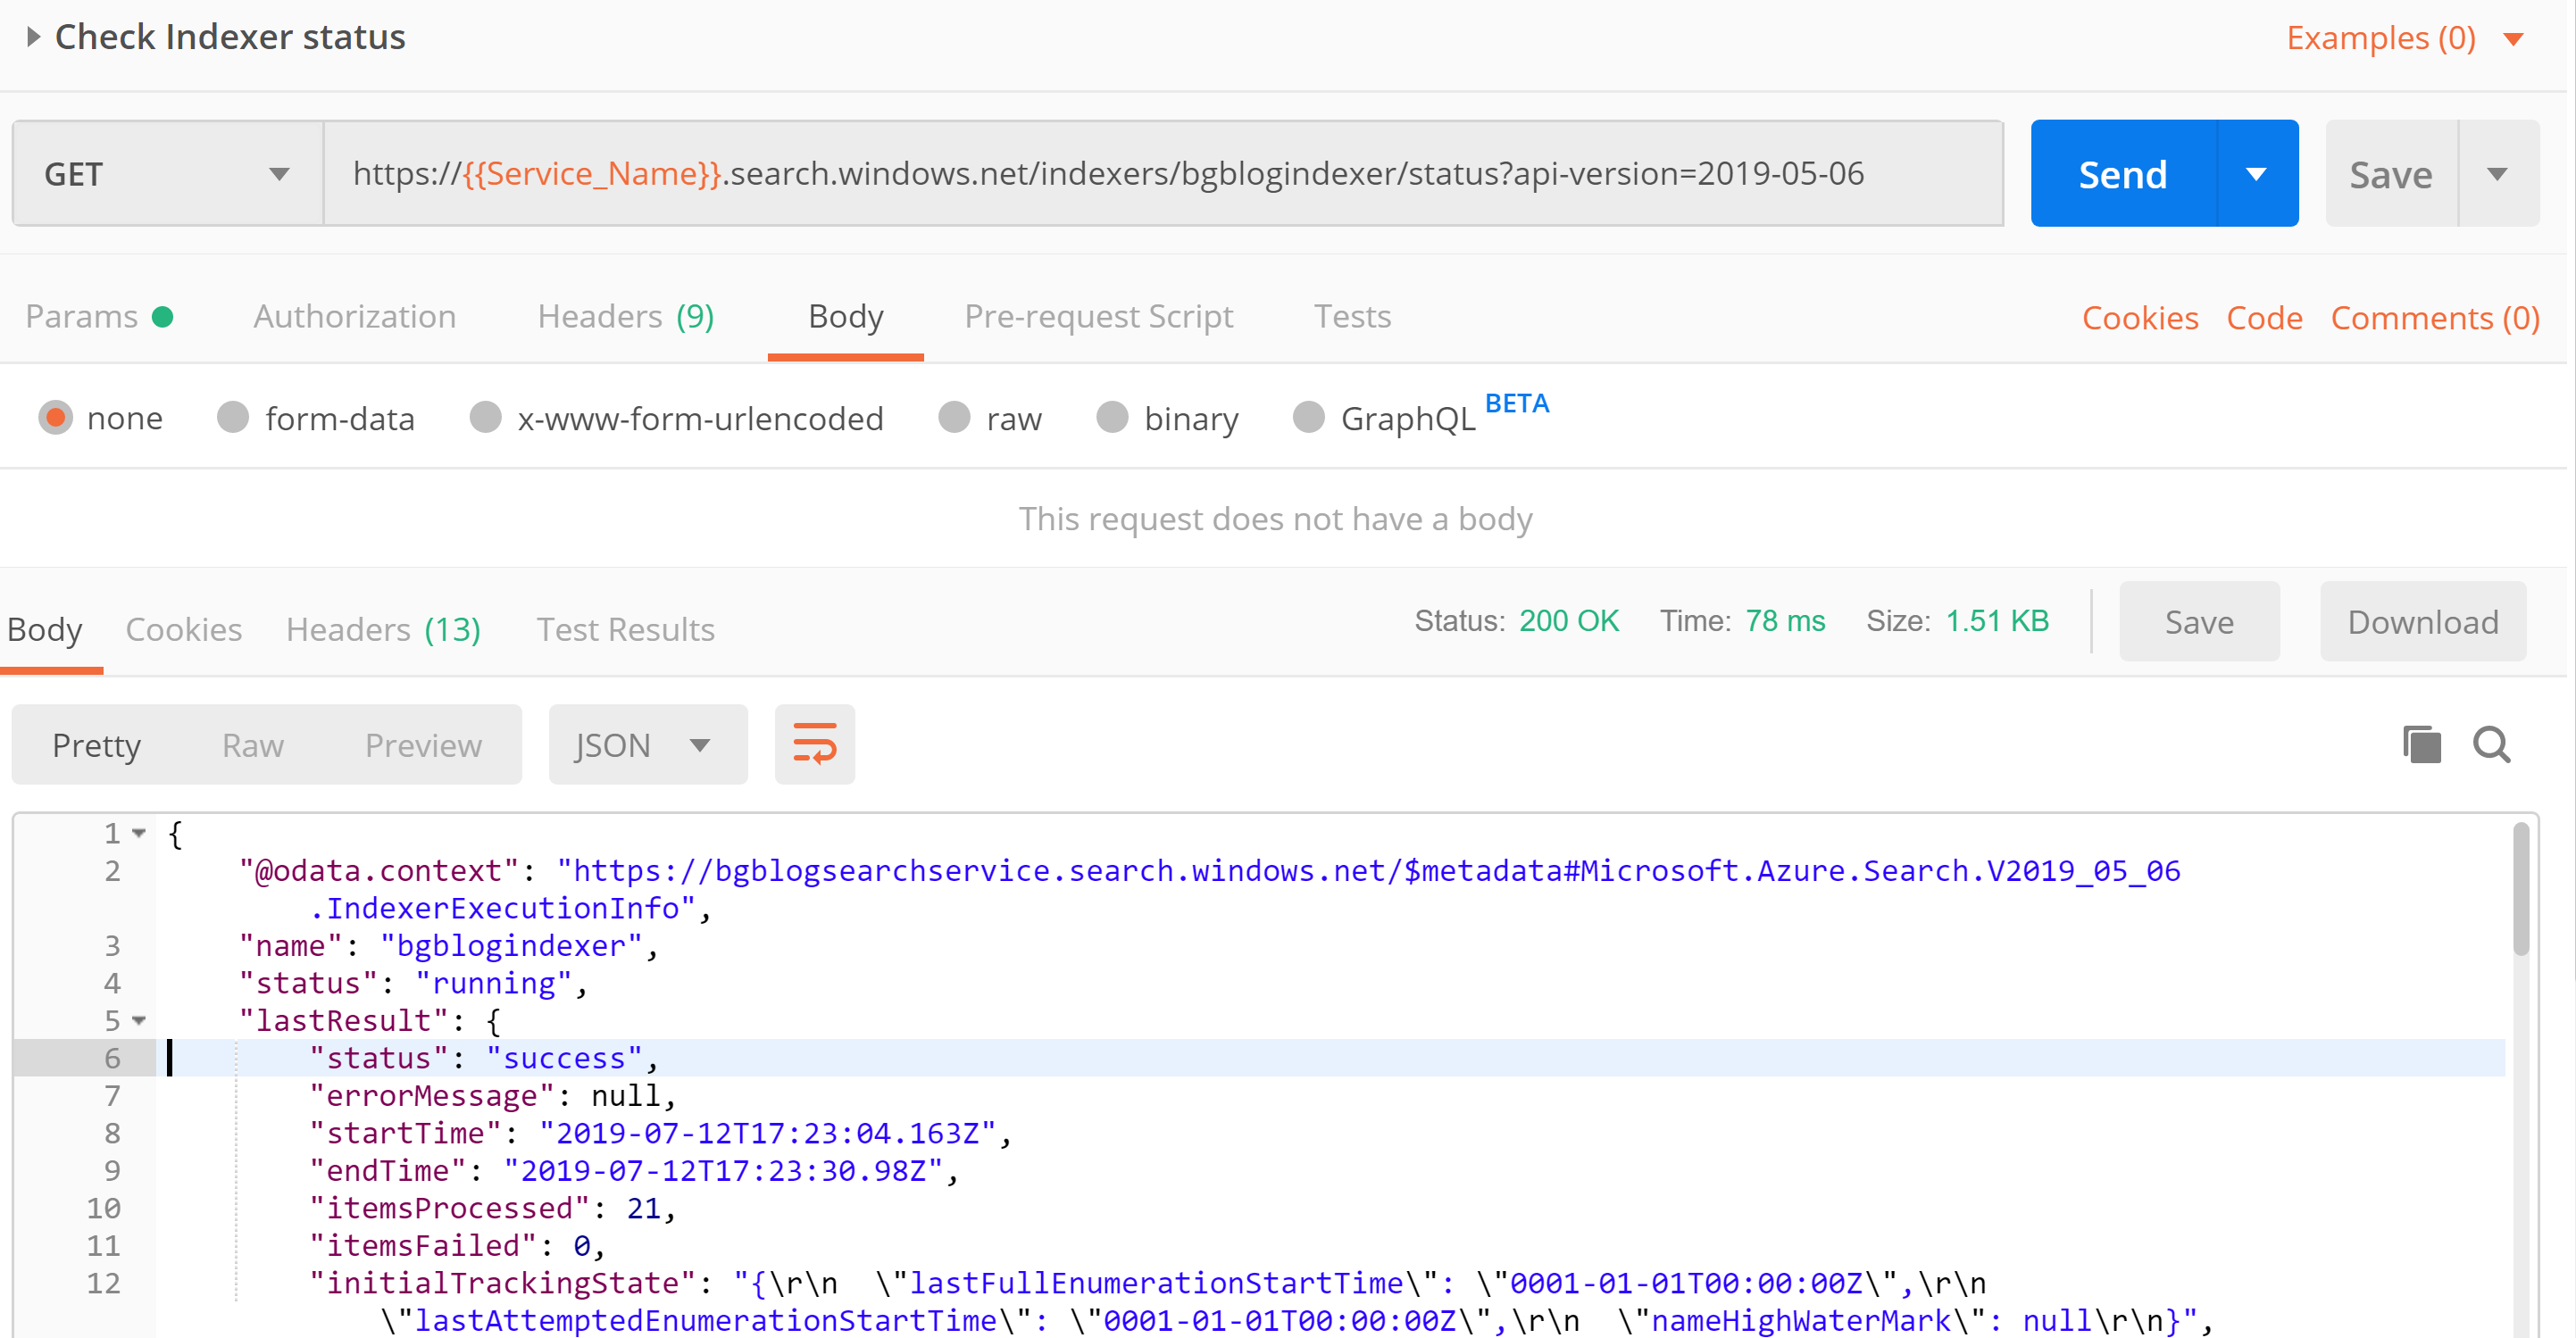
Once the “status” comes back as “success”, your Indexer has finished.
Performing A Search
We now have our Index populated with the data from our data source using the rules we defined in our Indexer.
The Index is now ready to Search!
The format of our API call to perform a search is:
GET https://[Search_Service_Name].search.windows.net/indexes/[Index_Name]/docs?[query paramaters]?api-version=[api-version]
There are a lot of potential [query parameters] we can use for our search. You can find a full list here. For this exercise we’re only going to use a few:
search=[string]
$count=[true|false]
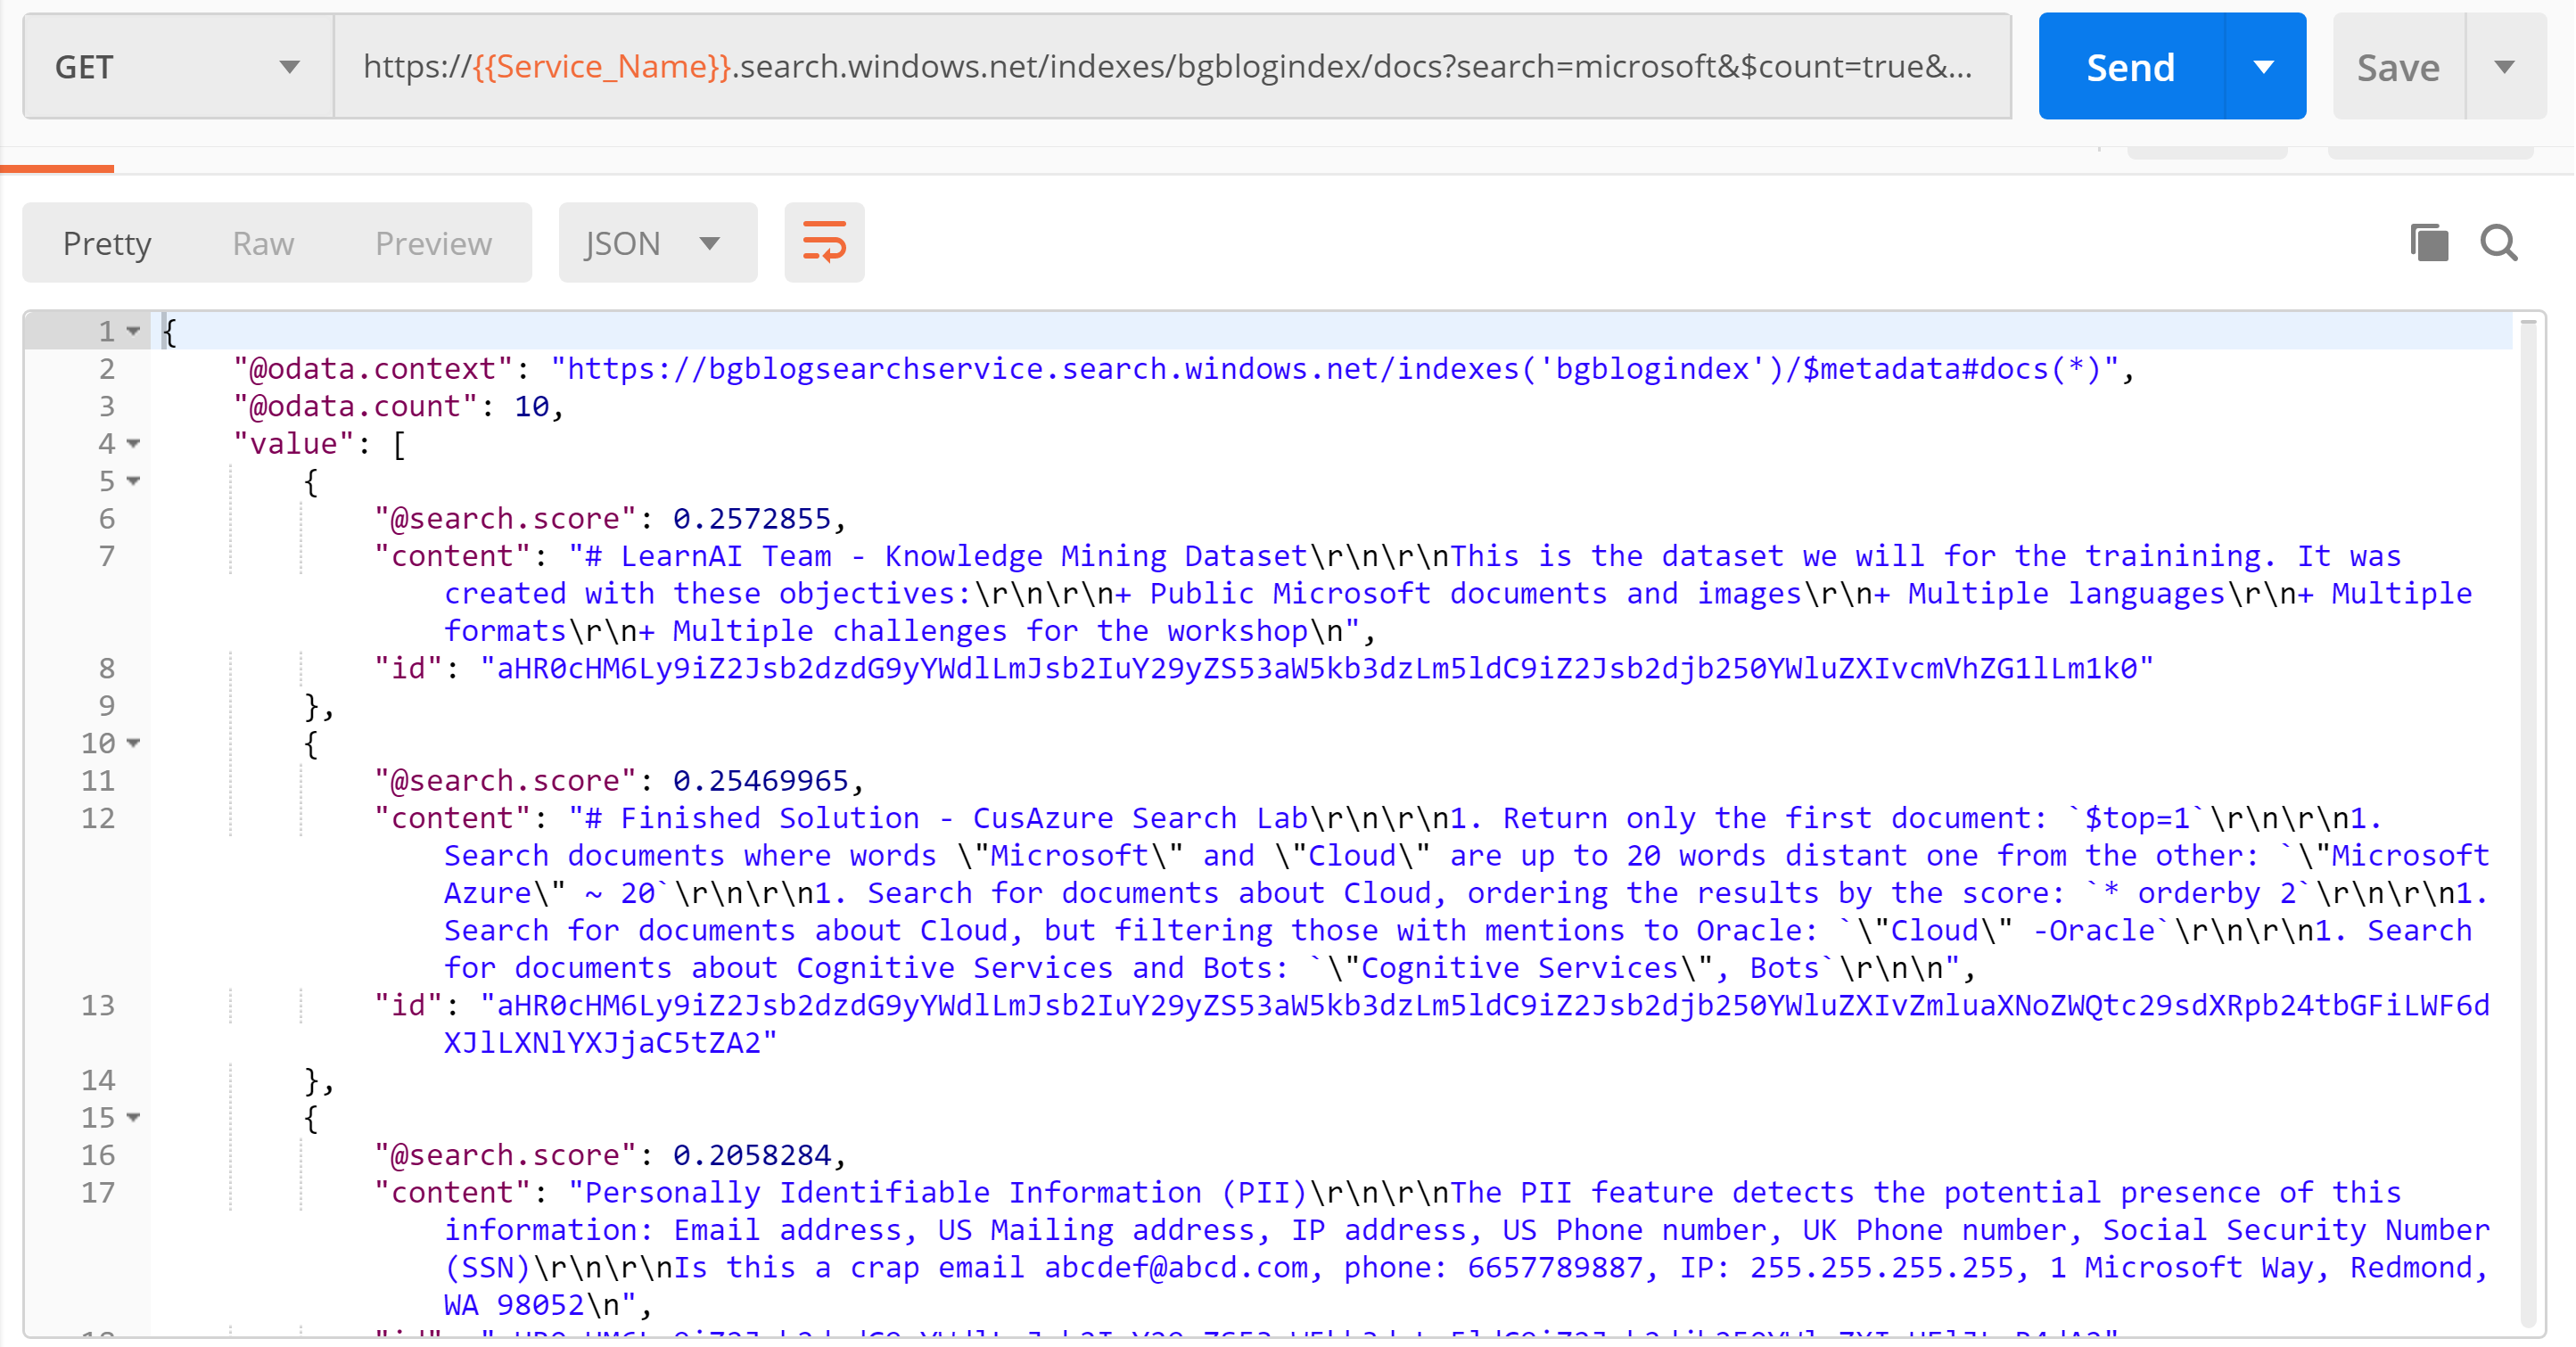
“search” is the term that we will be searching for and “$count=true” will give us back the count of the records found with our search term. If we use this API call:
https://[Search_Service_Name].search.windows.net/indexes/bgblogindex/docs?search=microsoft&$count=true&api-version=2019-05-06
If you used the files from the Knowledge Mining Bootcamp, you should return 10 records back from your Search and it should look something like this:
Congratulations! You’ve now created a data source, index, and indexer, as well as performed an Azure Search, all using APIs.
More to Come
In the coming weeks I’ll be exploring the many ways to use Azure Cognitive Search to more easily unearth knowledge from once-difficult-to-mine data sources. Be sure to subscribe to our blog so that you don’t miss a tutorial, or contact us today to discover the many ways 3Cloud can make the most of your data!
Reference and Resources
API Call Reference